M is for Methodology

Methodology. A word that reverberates in my head quite a bit. Its a specific approach and a way to do things properly. Something that requires time and nurturing.

The dictionary sites the origin of the word method as such. ORIGIN

late Middle English (in the sense ‘prescribed medical treatment for a disease’): via Latin from Greek methodos ‘pursuit of knowledge’, from meta-(expressing development) + hodos ‘way’.

Your tools will inform your methods through both time and trial & error. Fortunately we have access to some pretty sophisticated tools!

Your tools will inform your methods through both time and trial & error. Fortunately we have access to some pretty sophisticated tools!


Over the years I have refined my process of trying to build the best wheels possible. In 1973 it all started with some very simple tools, but they were more than good enough to produce some very impressive wheels if you took your time. Gradually new and better tools came into existence and they were embraced , though this always meant going back to the drawing board with your methods.

It was during that first year of building that i did something rather audacious. I dared to challenge the status quo by questioning conventional lacing patterns that were probably a 100 years old. One day I was stairing at a wheel that I just built and it dawned on me that there just might be a different way of lacing a bicycle wheel that could be superior. I ruminated on that thought and then decided I would pose this question to an engineer that sometimes dropped into the shop. One day he showed up at the bike shop and I sheepishly asked him if there was any merit in my idea, He listened to me and then went silent for what seemed like a an hour and then looked up at me and said, “well, your new lacing pattern would eliminate the stress riser on half of the spokes and thats a good thing” . Why don’t you build some wheels and see what happens”

That was enough for me to give it a whirl. I started building all my wheels with this symmetrical pattern instead of the conventional asymmetric pattern that virtually everyone else used no matter what country they were built in. My pattern had all the pulling spokes going in the same direction instead of opposite directions like all other wheels. All my pulling spokes left the flange cleanly without touching it and this eliminated the stress riser common to other lacing patterns.

This was probably the first time that I realised I was becoming very aware of methodology. Methodology mattered. This was no small thing. I was challenging every wheel builder in the world. Essentially telling them there was a better way.

Well, 47 years later and I still lace all my wheels in this fashion. Many other wheel builders around the world have adopted this lacing pattern and I am sure many have ignored it. Is it better? I’d say so.

This blog entry would be far too long if I went into all the reasons why I feel this is superior so I’ll leave that for another day, but suffice to say I realised the value of challenging traditional methods and thinking outside of the box.

I noticed that Enve now builds all their wheels with this lacing pattern. Its been acknowledged by some who have written books on the topic but I have never seen my name credited for this innovation. It matters little to me because I know who got there first.

I would say that this departure from the norm encouraged me to think independently and to fearlessly question anything I felt could stand some improvement. This was the birth of my very own methodology.

I was in a good situation to experiment because this was the era of the “bicycle boom” and I was being exposed to all sorts of new components and getting constant feedback from serious cyclists. As I have said before “this was the crucible that forged all my methods”.

Its amazing how much you can learn on virtually any topic if you dive deep enough down the rabbit hole and resist getting either jaded or cocky. As an old friend who worked at NASA once said, “The mind is like a parachute, it doesn’t work very well when it isn’t open”

It would be impossible to relate every last story and every change I have made along the way but I can say its been a constant evolution. Much of it driven by an increased knowledge of the material science required to understand why things work or fail. Its helped me immeasurably to learn about various metals and their intrinsic properties and now about carbon fibre and how that informs modern rim design and many other materials as well. Admittedly its not everyones cup of tea to fill your night time reading with the behaviour of 6061-T6 alloy under certain stresses or the importance of specific carbon lay up to achieve superior bicycle rims. But taking the time to understand these things has proved invaluable.

Its all helped to shape the way I build wheels. Remember, my goal wasn’t just to be a pro wheel builder. My goal was to be the best wheel builder in the world. That requires a lot of work and a unique approach.

Along the way I ran into a very interesting and relevant question about spoke tension. Should I continue to rely on my highly developed “feel” approach to correct spoke tension that I had trusted implicitly for decades? It had never once let me down and I prided myself on having acquired such reliable sensitivity to a wheels final tension.

But new tools were starting to emerge that supposedly measured this tension for you and gave you some sort of idea of a final tension in KGF. Kilograms of force for the uninitiated.

At first I balked at this notion that one needed such information and wondered if I should start relying on this tool to dictate my spoke tension. I kept asking myself if my “feel” had ever let me down and the answer was NO it had not. So for a long time I never bothered giving it much thought and kept building with my time honored methods.

Then I came across a situation where real hard numbers would have settled an argument about whether I had built a wheel to someone else’s notion of an ideal finished tension. I then realised that I didn’t have any quantifiable measurements that I could provide to convince someone of my expertise.

At that moment I started to see the benefit of recording these measurements to have some sort of record I could look at months or even years later to confirm that I had used an identical approach with a specific rim and hub combination. I could also talk numbers with others in the industry and we’d all have something that we could agree upon as a reliable guide.

I was quickly becoming a convert to the “spoke tension meter”. A new rabbit hole presented itself. I dove down to the bottom to see what I would find.

Being a complete tool junkie, it wasn’t long before I bought myself a good quality spoke tension meter. It was The DT Swiss Tensio 2. An analogue meter that was used by quite a lot of wheel builders who had embraced this before myself.

I quickly determined that this tool had its strengths and its weaknesses. This led to the search for a meter that didn’t have any limitations.

I was quite fortunate to stumble across a meter for sale that looked like it was made by some spoke tension guru. It seemed to tick all the boxes and I wanted that one! I ordered it and was blown away with the quality of workmanship and accuracy that this meter had. It also eliminated some of the inherent problems in the DT Swiss meter that bothered me.

This began a relationship with Filip Kralyevski, the designer and builder of this high quality tool. Filip is an interesting character who has a brilliant mind for design problems and is also able to actually make the things he dreams up!

Cognoscenti Cycles collaborated with this master CNC man and genuine design guru to produce the worlds best spoke tension meter. Filip’s talents are special. He’s not a pro wheel builder but he’s listens to your input which translates to a superior end product. He’s a perfectionist who goes straight back to the drawing board when its not just perfect. Our collaboration produced an amazing meter that I firmly believe is better than any currently available. Its degree of both sensitivity and accuracy is unparalleled. Its also quite robust with the best parts we could find. That tool helped shape my wheel building methodology in a way that I could have never envisioned prior to its existence. Its added a considerable amount of time to my build because I now take a brand new step that simply didn’t exist before this tool came along. I am happy to increase my build time to attain a new level of accuracy previously unattainable.

As time has marched on I have learned to not get too set in my ways and not to greet change with a degree of suspicion and hesitancy. I love experimenting with new tools to see how they can be incorporated in my work flow. Do they make better wheels? Did it make the chore somewhat easier? Most importantly did it increase accuracy. It always seemed to boil down to that. I am constantly striving to obtain an almost unachievable level of accuracy.

Its that mad desire to chase the ever elusive goddess of perfection. We all intrinsically know this is an unattainable dream but we press on nevertheless.

The Cognoscenti Cycles spoke tension meter. A CNC machined body with a Swiss made Atorn dial indicator. The THK linear roller bearing minimises unwanted friction to almost nothing.

The Cognoscenti Cycles spoke tension meter. A CNC machined body with a Swiss made Atorn dial indicator. The THK linear roller bearing minimises unwanted friction to almost nothing.


A Blast from the past…

Its always interesting to look back and see what’s changed and what’s the same. For instance, I am still using several tools that I started using in the 70’s. If it ain’t broke don’t fix it! The Campagnolo dishing tool that had its debut in 1952 remains basically unchanged and vintage ones fetch a pretty penny on Ebay regularly. Some claim they have improved on this design but I am not convinced. So I soldier on with my trusty Campy dishing tool that still delivers the goods.

The Campy dishing tool, first scene in the 1952 Campagnolo catalogue. This invaluable tool has stood the test of time.

The Campy dishing tool, first scene in the 1952 Campagnolo catalogue. This invaluable tool has stood the test of time.


Some tools have come full circle. Back in the early days I used an ancient Yankee driver to help speed up the lacing task. This tool was older than Methuselah! As the years ticked by I eventually became parted with that tool and somehow I kind of forgot about it. One day I was lacing up a wheel and I recalled that it seemed much easier and quicker when I had a Yankee driver. I searched the web to find one and was disappointed to find out that Stanley no longer made them. I continued my relentless search as any tool junkie would and finally came across a company in Germany who had done a faithful recreation of the old 19th century Yankee driver. So I ordered one up immediately and rejoiced when the mailman finally dropped it off. Its 1973 all over again and life is good!

What’s old is new again! My new German Yankee driver replete with a handful of different bits for different types of nipples. I can drive DT Swiss Torx, old school slot head for vintage builds and 3.2 mm double square nipples for both internal ( Env…

What’s old is new again! My new German Yankee driver replete with a handful of different bits for different types of nipples. I can drive DT Swiss Torx, old school slot head for vintage builds and 3.2 mm double square nipples for both internal ( Enve) and external nipples.

I am always looking for new tools to make things easier, faster, and more accurate but sometimes a new tool surfaces that didn’t exist before and someone just dreams up a new approach to an old problem. One of those was the new Unior Hub Genie. A clever tool that enables you to remove stubborn hub end caps that should normally just pull off by hand.

The Unior Hub Genie. A new tool to help remove tight end caps. Two different versions enable you to remove all sizes of end caps.

The Unior Hub Genie. A new tool to help remove tight end caps. Two different versions enable you to remove all sizes of end caps.

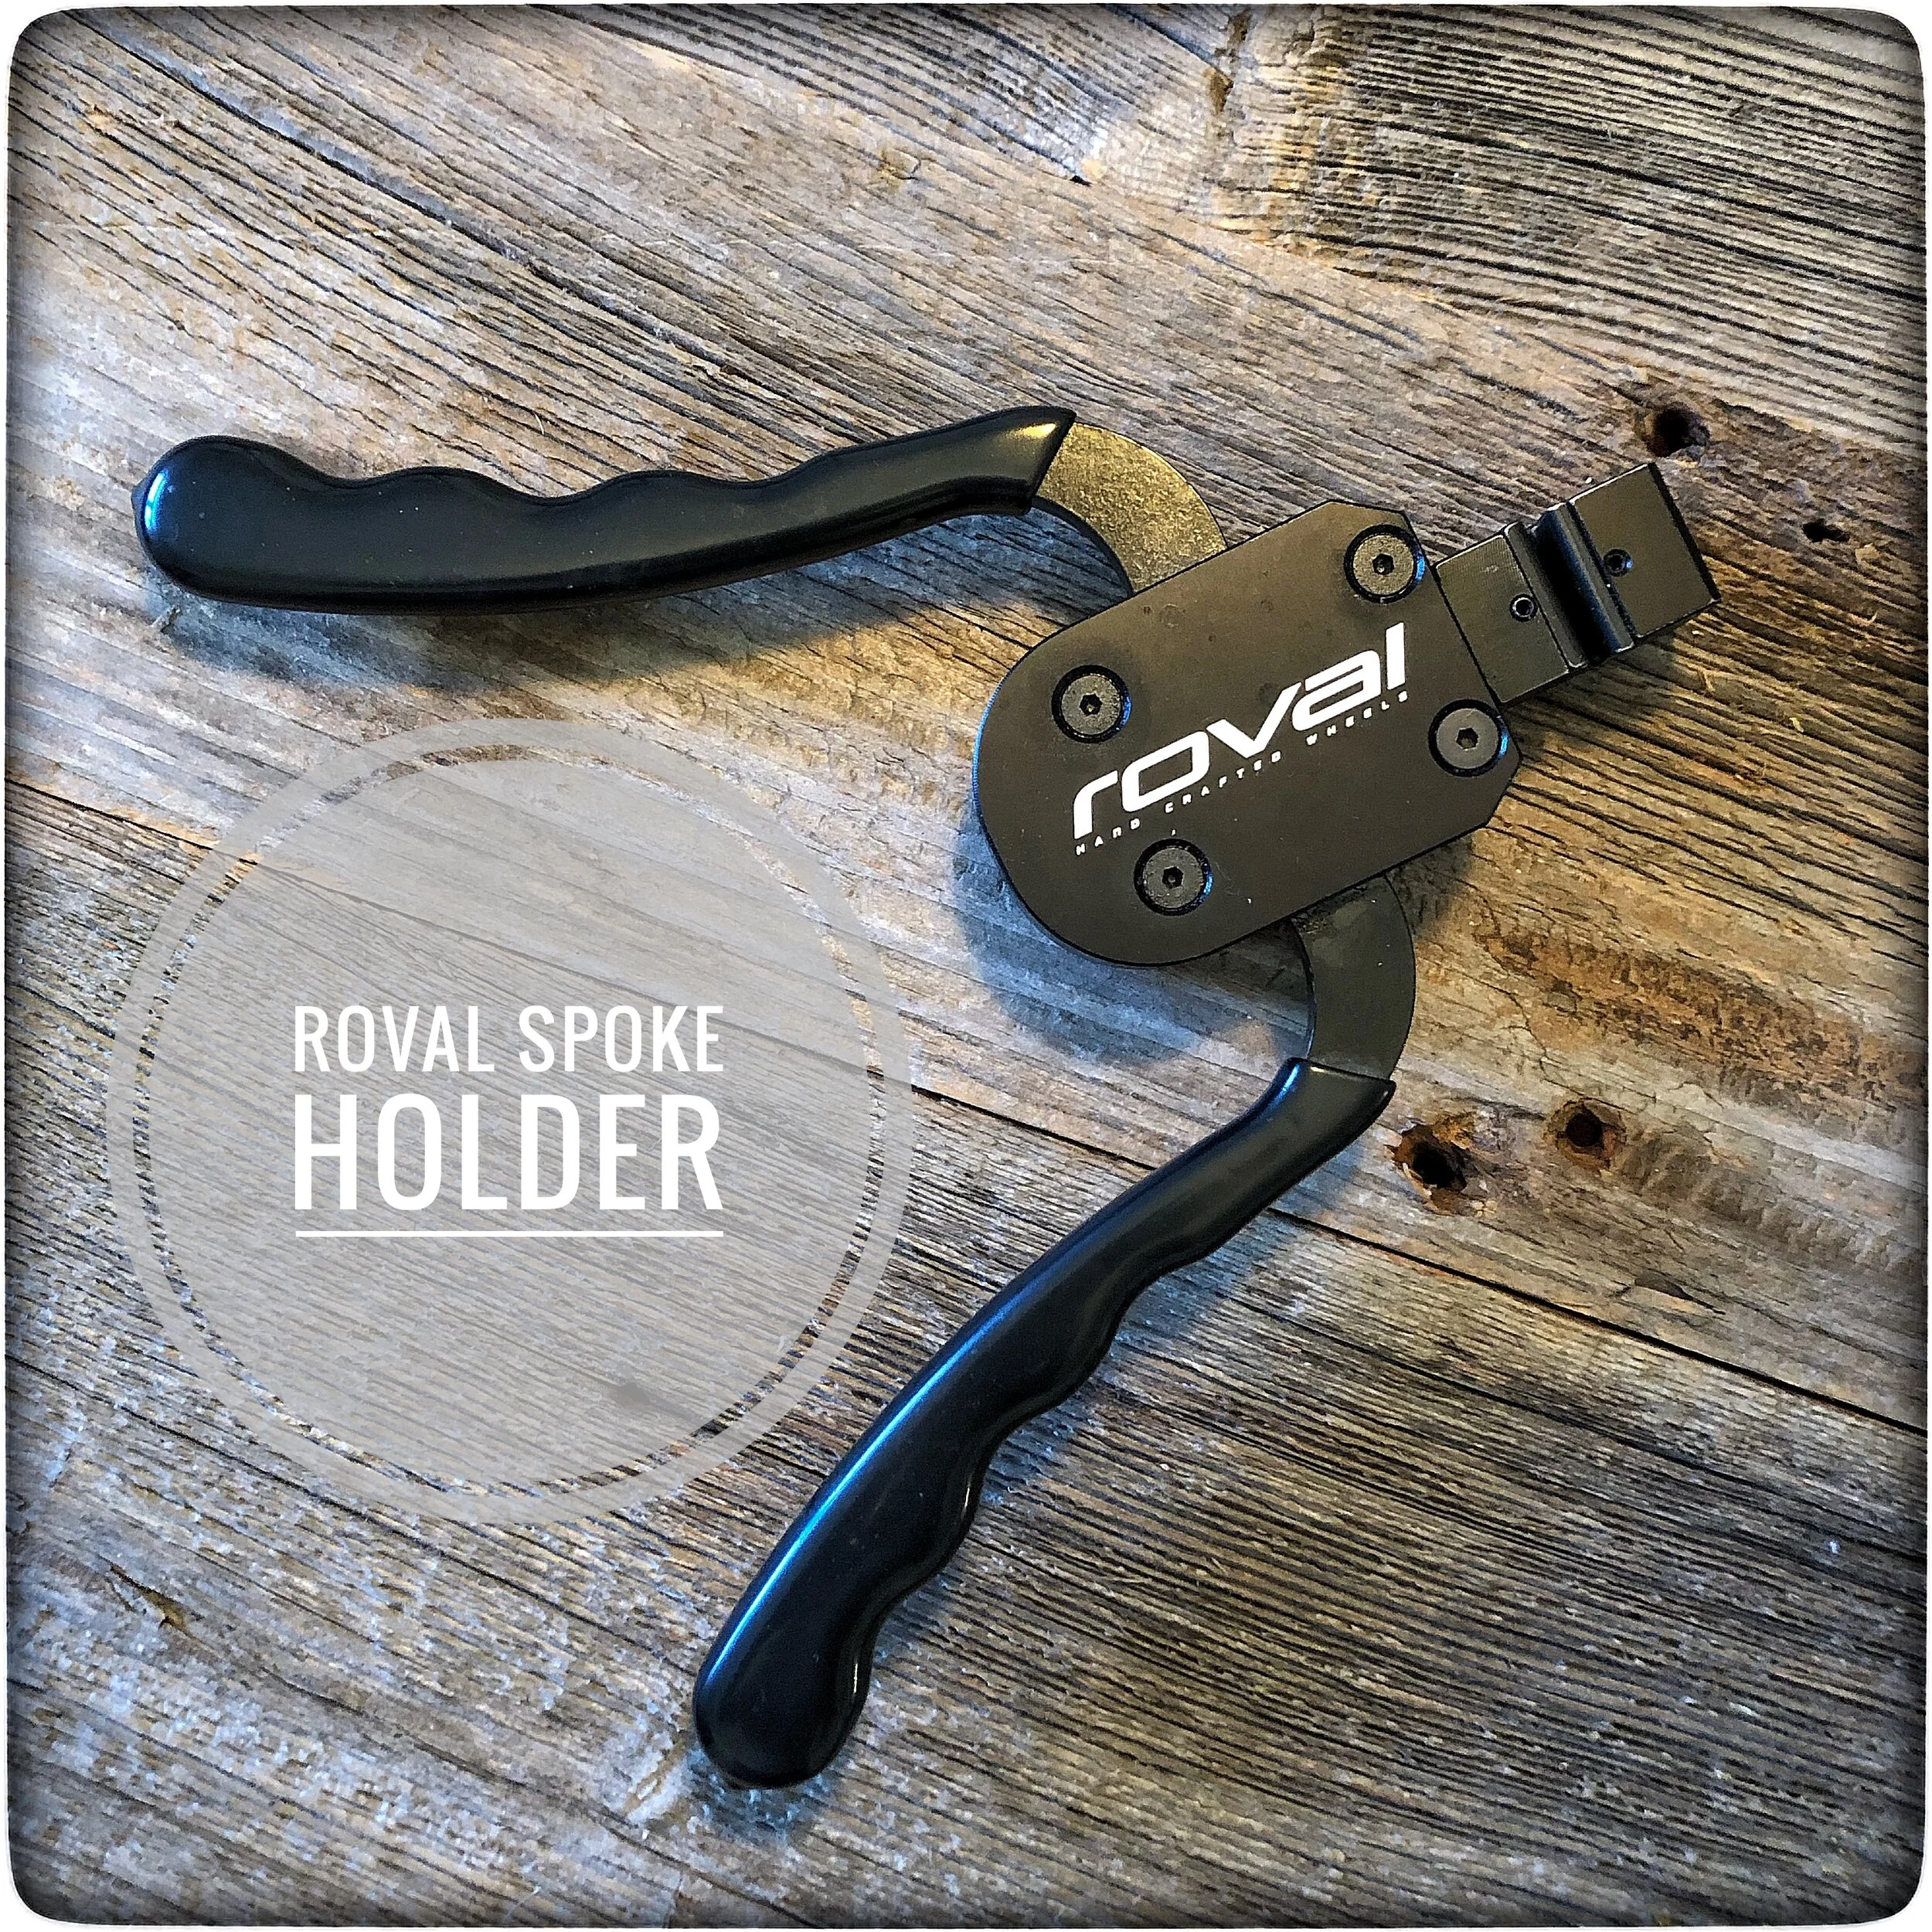
A new edition to my growing assortment of tools is the Roval spoke holder. This handy tool grips the spoke tightly to stop it from twisting or “winding up” as we say. Light weight spokes have a tendency to do exactly that when under higher tension and this can cause problems while building. The Roval tool stops this wind up from occurring while you make adjustments to the nipple. Invaluable!

The Roval spoke holder is an indispensable tool for stoping unwanted spoke wind up. Its a bit heavy but saves me a trip to the gym to lift weights!

The Roval spoke holder is an indispensable tool for stoping unwanted spoke wind up. Its a bit heavy but saves me a trip to the gym to lift weights!


My Park truing stand is another stalwart tool that I love. A simple heavy chrome plated beast that keeps going no matter how old it is. Mine has no fancy dials or any real upgrades, yet I still build wheels within ridicuously fine tolerances at even tension. Wheels that Egan Bernal or any top racer would be happy to be riding their most important races on. Nuff said.

Are there newer fancier truing stands out there? In a word, yes. If you’ve got the dough you can buy a lovely P&K Lie stand from Germany that’s a work of engineering art. Fancy dials and numerous brass fittings that make this the Rolls Royce of wheel truing stands. There are other high end stands like the one from Aivee in France. Its a gorgeous stand in a Ferrari red colour that rivals the P&K Lie for most stunning stand on the planet. Lastly is a creation from the UK that also is a beautiful work of CNC art. Bicycle Manufacturing has been making their model for a few years now and it also boasts super fine tolerances and just looks amazing.

DT Swiss has a truing stand that is their attempt at refining the wheel builder experience. Personally I wasn’t enamoured with how that stand functioned in real life. I bought one, hoping for an improved building experience and it left me cold. After only using it on one pair of wheels I quickly realised it was not my cup of tea. It was promptly boxed back up and sent back to Bike 24 for a full refund.

Will I buy another wheel truing stand? Probably…. When you are constantly refining your methodology you loose sleep over how to get to the next level and this usually involves experimenting with new tools.

Not all are perfect fits and you realise that something may work for another builder but its feng shui is definitely not for you!

This is why there are so many different approaches to wheel building. One guy/gal relies on truing by ear and another guy does something completely different and somehow both people build great wheels.

There are numerous other comparisons that could be highlighted but you get the point. And we all have our secrets. The black art of wheel building is shrouded in many secrets. We have more secrets than the Freemasons! So, I am guilty as charged! I have numerous techniques that I can honestly say I have never revealed to any other wheel builders. Even when I give wheel building seminars I am careful to leave out all of my special techniques! They are trade secrets, some new and some old, and they may follow me to the grave!

Made in Switzerland you say…

I recently bought a tool that came from a wheel builder in Switzerland. Blackcat Wheels has an excellent load cell custom made in cooperation with Tomasz from Fetish Bike.

This fantastic tool enables us to calibrate our new spoke tension meters to an incredible level of accuracy. It also enables us to evaluate new spoke models that require tension charts for our meters. This is a huge step forward in guaranteeing ideal overall spoke tension in every wheel we build. Chasing perfection like never before!

A collaboration between Fetish Bike and Blackcat Wheels in Switzerland. A beautifully made tool that facilitates the calibration of spoke tension meters to a super fine tolerance. The purple meter on the right is the Cognoscenti Cycles meter.

A collaboration between Fetish Bike and Blackcat Wheels in Switzerland. A beautifully made tool that facilitates the calibration of spoke tension meters to a super fine tolerance. The purple meter on the right is the Cognoscenti Cycles meter.

These sophisticated tools are usually not seen in large wheel building factories. They require seasoned expertise and extra time to build in this manner to produce the finest wheels in the world. But this is what differentiates us from wheel building factories. Small boutique wheel building companies build in a VERY different way in comparison to their wheel factory competition. Make no mistake, there is absolutely no comparison!

In this world of fine tools and know how, I have to give a shout out to Ric Hertjberg. He’s the owner and brains behind Wheel Fanatyk. This company sells wonderful tools to both budding and seasoned professional wheel builders, Ric has been at this wheel building game for almost as long as I have and has tons of experience at all levels of building. Who would know better what tools you’d need to build great wheels than him. Check out his website when you are hunting down the right tools to lead you to wheel mastery.

Ric has given us such gems as the Morizumi spoke cutting and threading tool. I bought one of these last year and its quite an impressive tool on several levels. Originally designed and built in Japan by Morizumi Masakazu who once worked for the Asahi Spoke Company. This super robust tool does a perfect job of allowing you to cut spokes within a half millimetre and with perfect threads rolled each and every time. There really is nothing that quite compares. It is now made in the USA with a few small improvements from its original design. Ric oversees its manufacture and tests each one before it goes out the door. If you custom cut spokes, then just buy one. Yes, they are hardly cheap, but it will make spoke cutting a joy. You won’t regret it.

The Morizumi spoke cutting and threading tool. A must have tool in a pro wheel builders arsenal. Available from Wheel Fanatyk. Thanks Ric!

The Morizumi spoke cutting and threading tool. A must have tool in a pro wheel builders arsenal. Available from Wheel Fanatyk. Thanks Ric!


Over the years all these new tools have given birth to subtle refinements of the entire wheel building process. Nobl’s wheel lacing jig is a new tool that makes a three handed job into an easy two handed job. It also doubles as the perfect tool to apply new rim decals. Kudos to Johnny!

I have to mention two little tools that I wish existed 40 years ago. The Mulfinger from EVT and the nipple shuffler from Wheel Fanatyk. Those humble tools make lacing a wheel so much faster and easier.

Efficient Velo Tools handy Mulfinger nipple tool. It comes in two lengths and certainly helps to speed up the lacing process! Paired with the Wheel Fanatyk nipple shuffler and you just made wheel building that much easier.

Efficient Velo Tools handy Mulfinger nipple tool. It comes in two lengths and certainly helps to speed up the lacing process! Paired with the Wheel Fanatyk nipple shuffler and you just made wheel building that much easier.

I would be remiss if I failed to mention how many different bladed spoke holders exist. All of them do the same job but they all are slightly different in how they fit in your hand and how much of the spoke they grab.

Over time i have found the best time to use each one of them. Some I use at earlier stages of the build when the spokes are not under great tension and then I transition to a different one when tension becomes increased.

DT Swiss has two ingenious models that dovetail nicely with their spoke key. For rims with internal nipples the longer plastic models by Icetoolz and Birzman work wonderfully.

Some of the bladed spoke holders tools that i use regularly. Lots of different shapes and sizes to work with!

Some of the bladed spoke holders tools that i use regularly. Lots of different shapes and sizes to work with!

With new spoke nipples the need for the right tools to turn them has arisen. The photo below will give you an idea of just how many tools I own to just turn spoke nipples. There are different interfaces, like 3.2 mm square heads, 5.5mm hex heads and DT Swiss’s Torx nipples to name just some of the sizes that exist.

These are just some of the many tools required to turn spoke nipples. Will there be more in the future? Undoubtedly!

These are just some of the many tools required to turn spoke nipples. Will there be more in the future? Undoubtedly!

As you can well imagine all these tools will lead to a multiplicity of different approaches for their use. Every pro wheel builder will eventually decide how he thinks a wheel should be built and finished. Probably no two methods will be identical.

This is not just in the world of wheel building. Every artisan making anything will come to his own conclusions on what the best methods are. In the end the proof will be in the pudding as the say!

There are some new amazing custom tools on the horizon for Cognoscenti Cycles that will help to once again refine the process. What are they? That would be telling! Got to keep those secrets secrets.

P & K Lies 3.25 spoke key. Its four sided and fits ultra snug which is great for use on anodised nipples, reducing the likelihood of leaving marks on a new nipple.

P & K Lies 3.25 spoke key. Its four sided and fits ultra snug which is great for use on anodised nipples, reducing the likelihood of leaving marks on a new nipple.

Mavic CXP Pro Carbon

My personal history with Mavic rims is a rather lengthy one. When I started building wheels in 1973 Mavic rims were very popular and were considered by many to be an industry leader in that sector of the bicycle business. So I can say that I have watched the evolution of this company over 40 plus years.

I would be lying if I didn’t say that Mavic has had its ups and downs and I have been judgemental of some of its wheel products over the years but always ready to give it kudos when I felt they had done something special.

Today I’d like to talk about some exciting new components that I feel should be on your radar. I am speaking about the new CXP Pro carbon rims and Mavic’s new disc road hubs.

IMG_1832.jpg


I am sure you are curious about these rims dimensions, so here’s what the numbers are. The depth is 45mm, and the internal width is 19.3mm. The external width is 24mm at the top of the rim side wall and gradually balloons out to 28mm at the thickest point. The disc rim has a hooked bead and the weight is 430 grams.

In my personal experience I have come to the conclusion that carbon rims at around 45mm deep offer the best bang for your buck. They provide some measurable degree of aerodynamic efficiency but they are not so deep as to pay a large wind penalty in strong crosswinds. At that depth they also come in at a very nice weight. Not at all heavy, and yet providing plenty of lateral stiffness. 45mm seems to be the sweet spot in my books.

I just finished building a set of these wheels and i must say they got me excited. I had built a few pairs of the CXP carbon rims in the last few months and I was quite impressed. They are made in Romania and I don’t know what secrets these rim makers have but I can attest to the fact that they have got it down pat.

Quality control is the most challenging aspect of making carbon rims. Its one thing to arrive at a good design, but much more challenging to produce large quantities of that product with strict quality controls.

This is were many companies don’t get a passing grade. I won’t mention any names but most wheel builders are aware of the rim makers that have questionable quality control.

Mavic seems to have risen to the challenge and answered with sound design and excellent quality control.

How do I go about determining a rims quality control you might ask. Cognoscenti Cycles has a unique and very time consuming process that puts every rim I build under the magnifying glass so to speak.

Its in the pre-tensioning work that gets meticulously done before any truing takes place. With the development of our super accurate spoke tension meter I am able to do very refined tension analyses in the early stages of a build. What does that mean? I’ll explain the process.

I gradually bring a wheel up in tension but I maintain absolute equal tension on all the spokes. Its at this juncture that I am able to get a snap shot of what a rim might have looked like after coming out of its mold and had its final curing time.

If the rim came out of the mold as a very flat and round object this will be apparent when subjected to the initial pre-tension stages of the wheel build. Meaning the wheel will exhibit very little lateral deflection and will also be quite round even before I begin truing it.

Conversely, if the rim came out of the mold more like a potato chip, with a lot of lateral distortion and its far from round , this will show up in the initial stages of my build.

Why am I going into this level of detail? Because this is the method that I have developed to determine what level of quality control a company has achieved in their rim fabrication.

So how did the Mavic CXP’s fare when under this level of scrutiny?

I can say with confidence that Mavic has got it figured out. These carbon rims are superb. Certainly one of the best carbon rims I have built in a long time. When in the initial stages of the build these rims were almost dead round and very laterally true requiring a minimum of finessing to finish them.

When I stressed the wheel to relieve spoke tension the wheel required next to no work to get it back to perfect. These are impressive results!

Mavic have chosen a 3K weave for these rims. Not necessarily as stiff as a unidirectional weave but this may very well be part of the design that deserves commendation. The art of the carbon rim has its own techniques and secrets to achieve specific results. A rim that’s too stiff may be more difficult to bring into perfect round and true. And it could be prone to cracking at some point. Too soft and it lacks its own intrinsic strength. There is a perfect balance that great carbon rims achieve. From the feel of this rim while bringing it up to tension I would say that Mavic has this dialled in quite nicely.

There’s one other detail present in this rims design that is absolutely worth mentioning and that’s staggered spoke hole drilling. You rarely see that these days and I can only assume that non staggered drilled rims came into existence as a cost cutting measure and not because someone decided it was a superior design.

Years ago virtually every rim had staggered drilled spoke holes. It was the norm and for good reason. It enabled the spokes that exited that hole to follow the correct trajectory of the spoke toward the hub flange. This minimised spoke breakage by reducing the strain on the spoke.

Over the last decade and maybe even a little longer than that there was a shift to not drilling these holes in a staggered fashion. I am sure this was a less expensive way to manufacture a rim but it wasn’t a good idea.

The new Mavic CXP incorporates the old school staggered rim holes and I think that’s great! It reduces a small degree of binding on the nipple by having it at a better angle when exiting the hole. Though I don’t have empirical scientific proof of this, I believe it enables you to true the wheel easier. Someone might want to challenge me on that statement but it certainly feels better when building with rims with staggered holes, and I still rely heavily on that intangible thing called “feel”.

Before the era of sophisticated tools like digital spoke tension meters, all wheel builders relied exclusively on “feel”, much like luthiers building musical instruments learned to trust their intuition as to when something felt just right.

The Mavic CXP Pro carbon rim. Tubeless ready and weighing in at a respectable 430 grams. An ideal weight for both road racing and training.

The Mavic CXP Pro carbon rim. Tubeless ready and weighing in at a respectable 430 grams. An ideal weight for both road racing and training.

What about the new hubs? First off I was quite pleased to see a pair of hubs that used regular J-bend spokes and not some sort of proprietary spoke that might not even be around in a few years. That alone was great news. I am a firm believer in providing products that will definitely have replacement parts in the coming years and not be sidelined because of unavailable parts. Any hub that utilises a J-Bend spoke enables the builder to choose a lacing pattern that suits both the rider and his cycling habits. The best of all worlds in my opinion.

In many ways these hubs are conventional and thats a good thing. Hub design has obviously evolved over the years yet there are certain constants that remain in the world of “sound design”. Mavic have opted for a medium flange size in this case. I think that was a good choice. It will offer a sufficient amount of compliance where needed and yet still provide adequate stiffness for most cycling disciplines. For you techies the rear flanges measures just under 50mm centre to centre and the front flanges are 44mm.

Mavic’s disc road hubs. With a tidy centrelock disc brake interface. NTN sealed bearings with their internal bearing preload. Suitable for either a road or gravel wheel set.

Mavic’s disc road hubs. With a tidy centrelock disc brake interface. NTN sealed bearings with their internal bearing preload. Suitable for either a road or gravel wheel set.

These hubs have no external bearing preload but a preload hasn’t been forgotten. Its actually happening inside the hub which is a unique approach. They incorporate a “wave washer” which exerts a small force on the bearing to keep it in adjustment. Clever!

Routine maintenance on this hub is straightforward requiring no special tools to remove both the end caps and the freehub. Mavic have chosen NTN bearings which are very high quality.

Freehub options are the usual suspects. Campagnolo, Shimano, and SRAM.

I hope you are in love with black because that’s all we have for colour options. Personally I love black as it goes with everything.

So what about Ride quality? I eagerly mounted these on my titanium machine and decided I would give them a serious test.

I should mention that I decided i would instal some very light and responsive tires so I went with the Vittoria Corsa 2.0 with graphene. This tire is well known as a super fast tire with minimal rolling resistance.

I also opted for the lightest tube made which comes from Austria, the Tubolito. This bright orange tube is a mere 39 grams and is made of a unique material that boasts twice the puncture resistance of any other tube made.

From the minute I pushed off I knew that these wheels were special. They immediately felt fast! And this feeling was foremost in my mind with every ride I did.

This light weight also translated into easier hill climbing with more than adequate lateral stiffness. I feel the increase in lateral stiffness was in part do to the choice to use 28 spokes instead of 24 spokes. Those 4 extra spokes really can make a significant difference with only the tiniest weight penalty. A 28 hole wheel will also do double duty and makes for a great “all road” set. Plenty light enough for fast club runs but strong enough to ride hard pack or rail trails with the right tire choice.

So what about quick acceleration and sprinting? Immediately I noticed these wheels were very responsive to a quick burst of speed. Nothing sluggish going on here whatsoever. A very lively wheel set that turned up the gas in a sprint beautifully. In that instance I also know that I was feeling all the positive attributes of the Vittoria Corsa tires and those crazy light Tuboltio tubes. Fast fast fast. I almost felt like I was cheating!

So, was there anything that I didn’t like? After careful thought I’d have to say there really wasn’t anything that I can think of that needed addressing, which is really rare. Some might remark that the rims are hardly cheap, but in the end you get what you pay for.

I think the most important thing about these wheels is the fact that Mavic has retraced its steps somewhat and is on the road to a former glory with a return to some familiar design considerations, like hubs with traditional J-bend spokes and a rim design that is both fresh and new with a nod to the past. All this in a package with the performance to back up these decisions.

This all adds up to something pretty cool. And I don’t think I want to take these test wheels off my bike for a very long time. They are much too fun.

My titanium Motobecane was the bike I used to test out the Mavic CXP wheels.

My titanium Motobecane was the bike I used to test out the Mavic CXP wheels.

280px-New_logo_Mavic.png


Gravel Guru's

Gravel grinding. Two words that have entered the cycling lexicon and will be as common to any cyclist as the term mountain biking has become.

My first foray into this uber fun cycling discipline was in the UK and one of the most memorable rides was deep in the mountains in Scotland. It was 1981 and I was experiencing some absolutely incredible roads for the very first time. I had not ridden on anything this unique and special before. I discovered ribbon thin roads in the Cotswolds that seemed like something out of a dream for a North American cyclist. Why didn’t we have roads like this back home I kept asking myself. The answer was actually quite simple when you gave it a moments thought. Age. These paths and roads were often ancient. Some may have been built by the Romans two millennia ago and others were merely goat and sheep paths. The good thing was that most of them were traversable by bicycle. Especially if you were comfortable on uneven and unpredictable surfaces. I now look back and realise I was gravel grinding well before the term had been invented.

But I certainly was not the first to have trodden these paths. Cycling clubs like The Rough Stuff Fellowship had been at it for decades in the UK. Nonetheless I was thrilled to have discovered this new cycling discipline. My baptism by fire was on those trails in the mountains of Scotland. I was on a cycling tour that took me across Europe and then all over the UK. One day I happened upon a few lads who were also on a cycling tour but they were local Scottsmen and they knew all the special roads like the back of their hands. They showed me the good stuff and I was immediately hooked! We road some thin little foot paths that seemed to meander endlessly but eventually got you somewhere . There was ruts and loose gravel to contend with and I realised a different set of wheels and different tires would have been much more suitable for this day on the bike but I managed ok with my touring set up.

When one thinks about it, gravel grinding is actually where we all started and its what we have decided to return to in an effort to escape modern day traffic and its inherent dangers. Better to take a tumble in some gravel than get run over by a Mack truck!

As a wheel builder I am now called upon to create wheels for this new breed of gravel heads and I like it. Its up my alley in a big way. There’s lots of new cool rims and hubs to fit the bill perfectly and the tire manufacturers are giving us new models all the time it seems. 650B wheels are now starting to get popular in this genre and that’s a good thing. Guys like Jan Heine from Rene Herse and Patrick and Ron from Ultradynamico are providing cool 650B tire options that will make you a convert.

If you are planning on taking gravel riding seriously I would invest in the right wheels and tires. It will make your experience all that much more pleasing and will increase your confidence when navigating gnarly gravel chunks and funky roads. Trust me, you will get addicted to these crazy roads and you want to be prepared with the right gear.

Check out my page entitled Off Road Wheels for a glimpse into some hub and rim options. There’s lots to choose from at numerous price points. We’ll need to have that tire discussion at some point as well. That’s really important. Getting on the right rubber will make all the difference.

This season I built lots of gravel wheels for everybody from general enthusiasts to guys racing events like Dirty Kanza so I’ve got lots of feedback to help refine the process. Being a serious gravel dude myself I am always thinking about ways to improve my wheels when possible.

Drop me a line if you need some advice or if you would like me to build you your first set of serious gravel wheels. It would be my pleasure.

IMG_0861.jpg


No.22 Titanium Dream Machine

If you are at all familiar with USA made titanium bikes you will likely have heard of the name No.22 That cleaver name is the atomic number for the metal titanium. These beautiful machines are carefully built in upper New York state by very experienced welders who cut their teeth with other respected titanium bike builders in years past. If you are fortunate enough to own one of these bikes you probably were quite particular with the components that you draped on that gorgeous frame. This is where Cognoscenti Cycles comes into the picture. I got an email from Joseph from Brooklyn NY who wanted me to build him a very special set of wheels for his new No.22 titanium steed.

They had to tick a few boxes as often is the case and this requires a bit of careful thought. In the end I came up with some suggestions that met all the requirements of light weight, speed and durability across several road conditions.

I tend to design from the centre out which means I start by considering what the possible hub options might be. We weren’t constrained by budget so that meant everything was on the table. After considering several USA made boutique hub manufacturers we landed on Onyx. If you know me, you are already aware that I am a huge fan of Onyx hubs. I ride them myself and I guess that’s a pretty good clue that I am completely sold on their unique design features and bombproof build. We opted for the new Vesper model. Its a tad lighter than other Onyx models. The unique Sprag clutch that separates Onyx hubs from all other is not light by modern standards, but it’s other features far outweigh its extra grams of steel. The Sprag clutch provides instant engagement when you hit the pedals and I do mean instant. When you are not pedalling it completely disengages and offers next to no rolling resistance whatsoever. No other hub in the world does this. Oh, and did I mention that its dead silent! Yes, DEAD silent. Add to the equation some top quality German Verinent ceramic hybrid bearings and you have a ride like no other.

IMG_0828.jpg

The next consideration were the rims. We agreed that carbon was undoubtedly the way to go as this would add that much desired extra degree of compliance when you hit those gravel roads. This is the wonderful thing about carbon rims that is almost never even mentioned. If a carbon rim is well designed with proper carbon lay up it can both be adequately stiff and strong but have some road shock dampening qualities that render it special. Considering how costly they are one would hope you’d get all those benefits! But not every carbon rim exhibits all those characteristics and they are definitely not all created equal. This is were a very experienced wheel builder is worth his salt. After building countless models from many different companies one eventually gets a clear picture as to which ones deliver the goods and which ones just own a ton of hype.

In steps Nox Composites from Tennessee. These guys don’t have the biggest name in Carbon rims but they do delver the goods. I recall building my first pair of their carbon rims for a cyclocross rider and man was I impressed. Immediately they were on my radar. After a complete season of thrashing those very light rims they were still perfectly round and true.

So for Joesphs wheels I chose the Nox Composites Falkor 36D. its quite light at 415 grams and it sports an asymmetric offset of 2mm which helps equalise spoke tension especially important on the rear wheel. The depth of 36mm was just right. Deep enough to have a slight aero quality and compliant enough to react well on some bumpy gravel roads. The outer width of 27mm works well with the 28mm tires that were mounted. Pair those with the new Tubolito ultra light tubes and you have very low weight and very minimal rolling resistance for days when you just want to fly across the pavement.

Ready for anything, be it gravel roads or smooth as glass pavement.

Ready for anything, be it gravel roads or smooth as glass pavement.

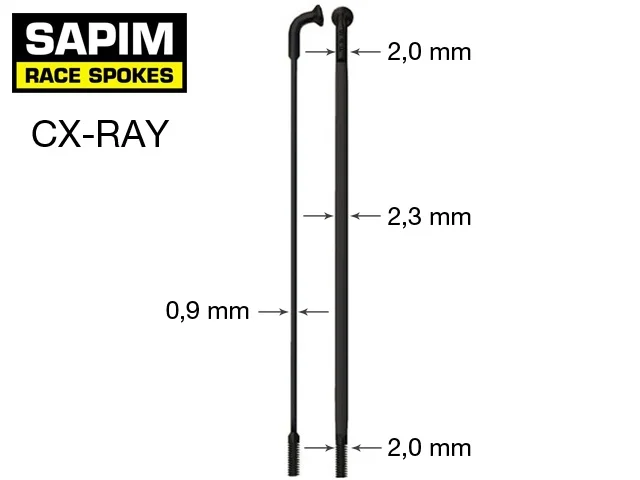
Sapim CX Ray bladed spokes were the obvious choice for very light weight and superior strength. Alpina ABS alloy 5.5mm hex head spoke nipples from Italy were also used. There really is no better nipple made and believe me that tiny component is really important, yet often gets overlooked. One must remember the devil is in the small details. All of them.

The actual build went very smoothly as I had hoped it would. No surprises whatsoever. The rims built up beautifully and I knew that Joesph was going to really enjoy these. I boxed these up very carefully for their Fedex trip to New York. All went well.

Joesph kindly sent me this photo ( below) of his No.22 “Great Divide” against the Californian coastline, making me instantly jealous for warmer cycling weather! Looks like the ultimate bike on a perfect road!

Joesph’s No.22  titanium machine. Totally stunning!

Joesph’s No.22 titanium machine. Totally stunning!


The Oregon Wheels

It was long overdue for me to finally build up a pair of light carbon road wheels for myself. I had ordered a set of Matte Punch hubs from Chris King over a year ago and they sat on my bench waiting for me to finally decide what rims would complement them.

With all the great choices out there I admit to deliberating for many months on which company and which model would grace my road wheels. After building up several pairs of excellent carbon rims from Astral Cycling on other builds it became clear who would be building my rims. This USA company is based in Oregon, coincidentally the same state that Chris King works from, hence the title “the Oregon wheels”.

So, which rim model was the right one? After some consideration I decided upon the Veil series. The Veil 4 to be precise. Its 42mm deep and weighs 445 grams which in my opinion is pretty much ideal for a carbon road rim. Its external dimension is 28.5mm wide with an internal width of 19.5 mm. Ideal for the 28 mm tires I’d planned to be riding. The 42 mm depth ticked all the boxes for me. Deep enough to offer some aerodynamic benefits but not deep enough to be problematic in strong cross winds. It also offers the right amount of stiffness with the large flange found on the Chris King R45 hub. I choose 24 holes, front and rear to keep the weight low. Sapim’s bladed CX Ray was the spoke of choice to add stiffness and to keep that spinning weight down. Light alloy Alpina ABS 5.5 mm hex head nipples were an important choice. Sapim’s HM stainless steel washers fit that nipple perfectly. They provide a perfect platform for the nipple to turn effortlessly on and help to stop cracks from forming in the rim.

As far as aesthetics are concerned, I am partial to the very subtle light grey coloured decals that are perfectly understated. Very tastefully done!

IMG_0477 2.jpg

Chris King has recently celebrated 40 years in business and it was time to finally invest in a set of his impressive hubs. I decided to get a not so subtle colour and couldn’t resist the very electric Matte Punch. Certainly at very least a conversation piece when out with other riders. Since Chris King makes his own bearings I thought I would opt for the upgrade to ceramic hybrid ones. Even if it’s somewhat of a placebo effect its good to know you are spinning on uber fast bearings! I love that big 57.4 mm flange on the R45 disc hub. It adds a degree of needed stiffness in the build, especially on wheels with lower spoke counts like the ones I was building. Disc brake wheels require that extra degree of stiffness as they undergo serious forces when braking.

Chris Kings flagship disc hub, the venerable R45 which is so named for having 45 points of engagement. Perfect in pink with ceramic bearings no less!

Chris Kings flagship disc hub, the venerable R45 which is so named for having 45 points of engagement. Perfect in pink with ceramic bearings no less!

How did these wheels build up? Impressive in a word. I was quite blown away with how well built those Veil 4 rims were. In the initial stages of the build they were exceptionally round and required very little correction in this area. That’s a sign of a superb rim with a high degree of quality control. You certainly don’t see that every day! When reaching the final tension of about 110 kgf the rims showed little sign of being overwhelmed at this tension which is a good thing. All in all a very well designed and built rim. Kudos to the guys at Astral Cycling for keeping their quality control very tight.

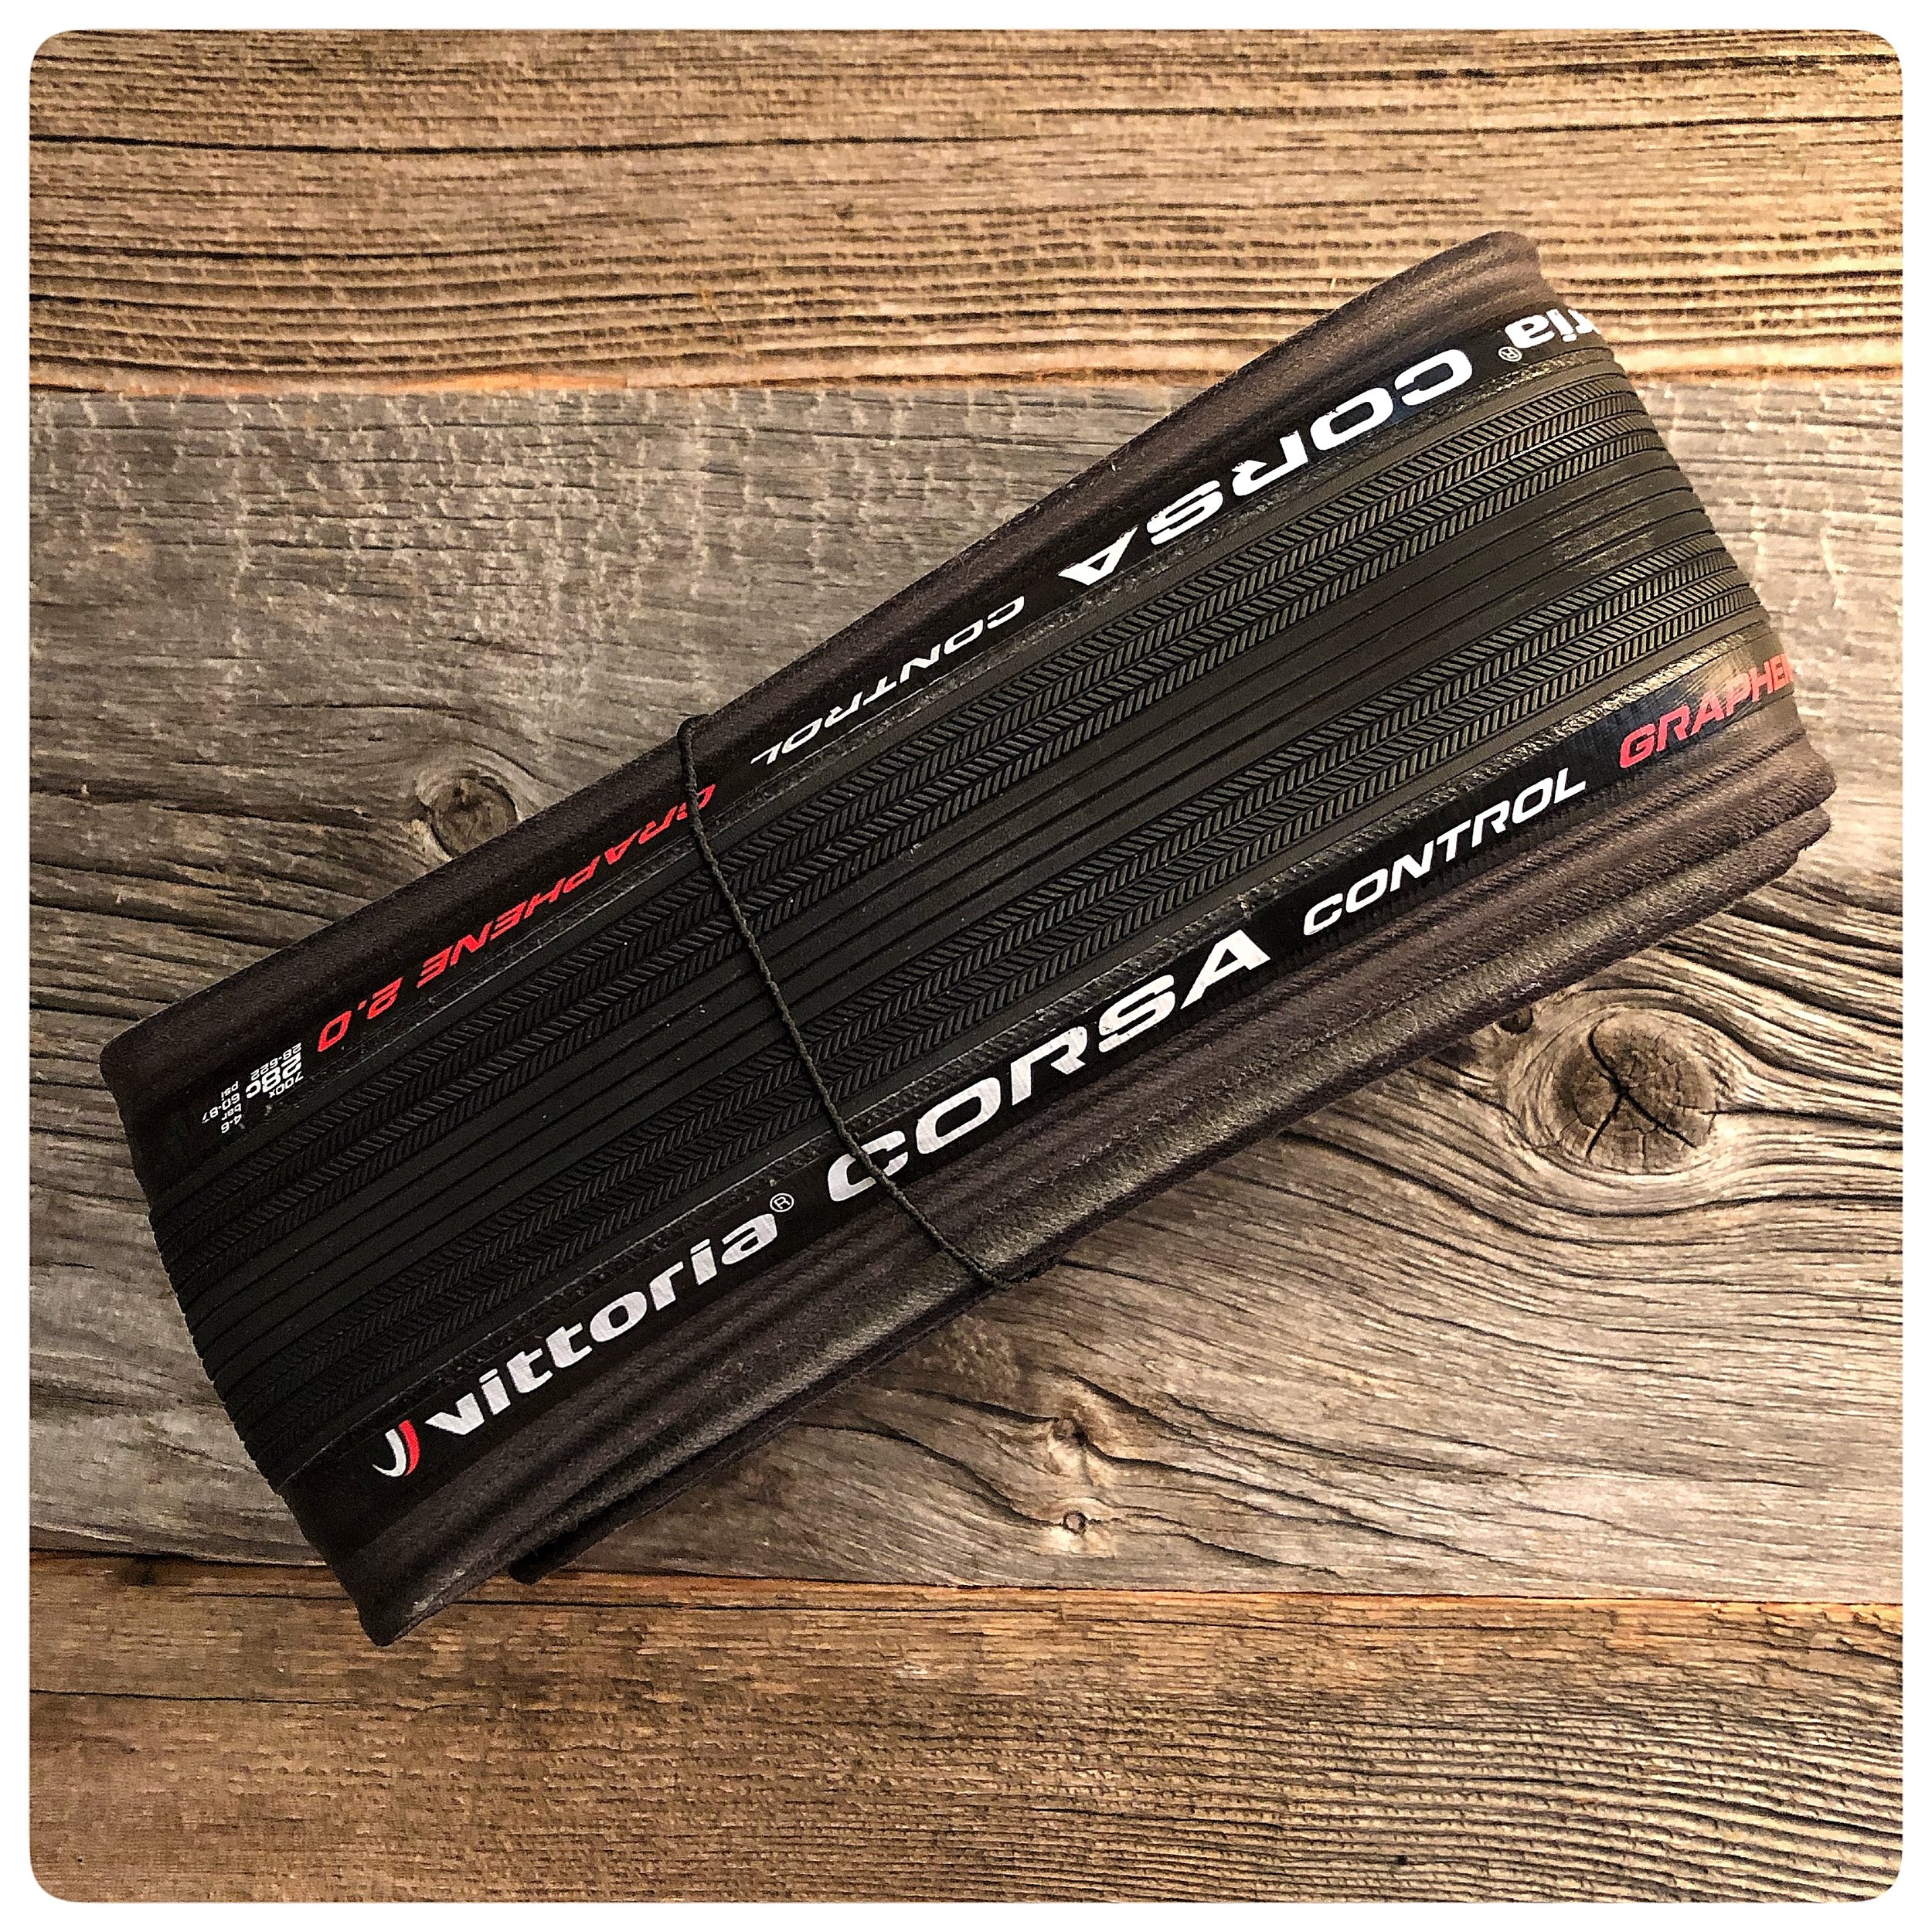
The final decisions for this build were tires and tubes. I wanted light weight high quality tires with ultra low rolling resistance and tubes with the same properties. In the end Vittoria’s graphene infused tires won out. Light and fast 28 mm tires with a reputation for speed. Vittoria’s tires have been independently tested as having the lowest rolling resistance.

Vittoria’s Corsa Control tire. Graphene infused with a 320 TPI cotton casing. Super low rolling resistance and excellent grip. Fast, fast fast!

Vittoria’s Corsa Control tire. Graphene infused with a 320 TPI cotton casing. Super low rolling resistance and excellent grip. Fast, fast fast!

My tube of choice was the new Tubolito. You may have yet to hear of this product as its rather new. A bright orange high tech material that’s neither butyl or latex. The material is used in the world of speaker design but exhibits properties that work well for inner tubes. Its approximately a third the weight of a regular butyl tube and twice as puncture resistant. Its one piece and doesn’t loose air pressure overnight like a latex tube. Lastly, it folds down so small that two can easily fit in your seat bag. Pricy but exotic, I imagine a perfect compliment for my very light set up.

Weighing in at an incredible 39 grams the Tubolito certainly is the lightest tube currently made. It requires its own dedicated patching kit for repairs.

Weighing in at an incredible 39 grams the Tubolito certainly is the lightest tube currently made. It requires its own dedicated patching kit for repairs.


820 grams for the rear wheel and 690 grams for front. These are going to be fun!

820 grams for the rear wheel and 690 grams for front. These are going to be fun!

Shimano Ultegra disc rotors and cassette were the obvious choice to work seamlessly with my Ultegra R8000 group.

I am super stoked to get out on these wheels and I now have little excuse to not be up front and centre on those fast group rides! If you feel that a pair of similar wheels might enhance your ride, let me know as I’d be happy to build you up a pair.


Wheel Designs

Wheel designs. What exactly goes into a proper wheel design and should I be concerned about this when considering new or custom built wheels? If you are planning on buying new wheels or getting them custom built you should at very least be curious to know what goes into a properly designed set of wheels.

There are numerous approaches to the design of a bicycle wheel and they vary wildly. They are not all equal and some are down right terrible. In the last few decades we have seen efforts to depart from tried and true wheel designs with the desire to create something new. It could be for a perceived aerodynamic gain or for weight reduction or other performance gains. Sadly not all are actual improvements. Some boil down to a different look and could be accurately criticised as pure fashion and nothing more. On occasion there are real world benefits with measurable improvements. Those are rare. Most unfortunately are nothing more than different with no measurable gains.

So what should you be looking for? First off you need to ask yourself how you plan to use your new wheels. Are they for racing, for training or are they for a specialised discipline like time trialing or for a triathlon. Are they for MTB or gravel riding? These are the questions you should start with.

Whatever their eventual purpose you’ll want them to be robust enough to easily survive their daily use. You should consider your body weight with the the actual weight of your wheels. Its foolish to think that a pair of wheels built for a 135 pound racer will be suitable for your 185 pound body. The guy who weighs 135 pounds will be perfectly at home on those 24 spoke wheels while the guy who is 185 should be considering at least a set of 28 hole wheels or he is potentially inviting trouble down the road.

To understand the fine details of wheel design you’ll have to start investigating the individual components that make up a wheel. The individual weights of each component matter when determing whether or not those components will be suitable for you personally. Don’t worry about what someone else is riding. Concentrate on yourself and your specific needs. This is were a custom wheel set begins, taking into consideration what you actually need and giving no thought to the other guy in your cycling club or your favourite pro rider.

Lets begin with spoke count. The trend has been for lower spoke counts which is an effort to mimic what the pros are riding. Remember, they get their wheels for free and they probably own a dozen pairs that are meticulously looked after by pro bike mechanics daily. That’s not going to be your scenario so don’t try to emulate their choices. A few extra spokes in a wheel is going to add the tiniest amount of weight and in many cases will actually improve your ride by adding more stiffness and strength that you’ll actually notice when sprinting and climbing hills. That pair of 28 spoke wheels might feel a lot better than that set of 24 spoke wheels. If you’re a heavier rider you’re going to need more spokes and there’s no getting around that. So don’t give it a second thought.

Next lets consider rim depth. The wonderful thing about carbon rims is the freedom rim designers have with the shape of the rim. This has lead to a myriad of designs and most of them have specific design objectives in view like aerodynamics and weight reduction and lateral stiffness. Many carbon rim designers have introduced at least a few models that are quite deep. Is deeper better? It depends on several things. Like most things there are pros and cons to deeper carbon rims. Their can be aero gains, yet those deeper rims use more material and therefore are heavier. Strong cross winds can make deep carbon rims unmanageable for a novice bike rider. Personally I have found there is a sweet spot for carbon rim depth. I would say you have the best of all worlds if you stay between 32 and about 45 millimetres. That still builds up a nice stiff wheel but doesn’t threaten to give you problems on a windy day. Also you can still get a decent light weight rim at those depths.

Hubs. This could be a very lengthy discussion so I’ll try to keep it succinct. There are many different hub designs. Some utilise common J bend spokes and others use straight pull spokes. Some have large flanges and others small flanges. Some have flanges of different sizes while other have flanges that are identical in size. This can be quite confusing when you start to look closely at the hub designers intentions. Some hub designers pay close attention to the bearing spacing while others are more concerned with the bracing angle of the non drive spokes in hopes of equalising spoke tension of both rear wheels and front disc wheels. There is some complicated math going on here if you go deep enough down the rabbit hole but that won’t be considered in this short overview of hub design. Lets start with flange size. Its been known for quite some time that a larger flange aids in adding more stiffness to a wheel by shortening the spoke length and altering the height at which crossed spokes intersect. This may be a very desirable thing if stiffness is desired. On the other hand a smaller flange will add a degree of compliance to a wheel that may be preferred for cyclocross or gravel riding. If you opted for deep carbon rims you may purposely want a lower flange hub to build in that extra degree of comfort. Its a matter of finding a perfect balance in the wheel so that it ticks all the performance boxes but doesn’t ride like a brick! So you can start to see that there are recipes for spoke counts coupled with rim depth and flange size. Of course there are a myriad of possible combinations and this is where the experience of the wheel builder begins to become very important if you want a wheel that makes sense for your own cycling needs. It can quickly become complicated and requires someone who knows how each choice effects another choice.

And I should really stress that these choices need to make sense mechanically and not merely be aesthetic ones. Too often people will make choices based largely on aesthetics first while barely paying any attention to functionality.

Again the extensive experience of a pro wheel builder will aid you in making decisions that you won’t later regret. This is one of the main reasons for seeking out the help of someone who knows these things intimately. There’s a lot going on in any set of wheels that need to be evaluated for your needs only. I’d be happy to help you navigate that successfully!

Vintage wheels

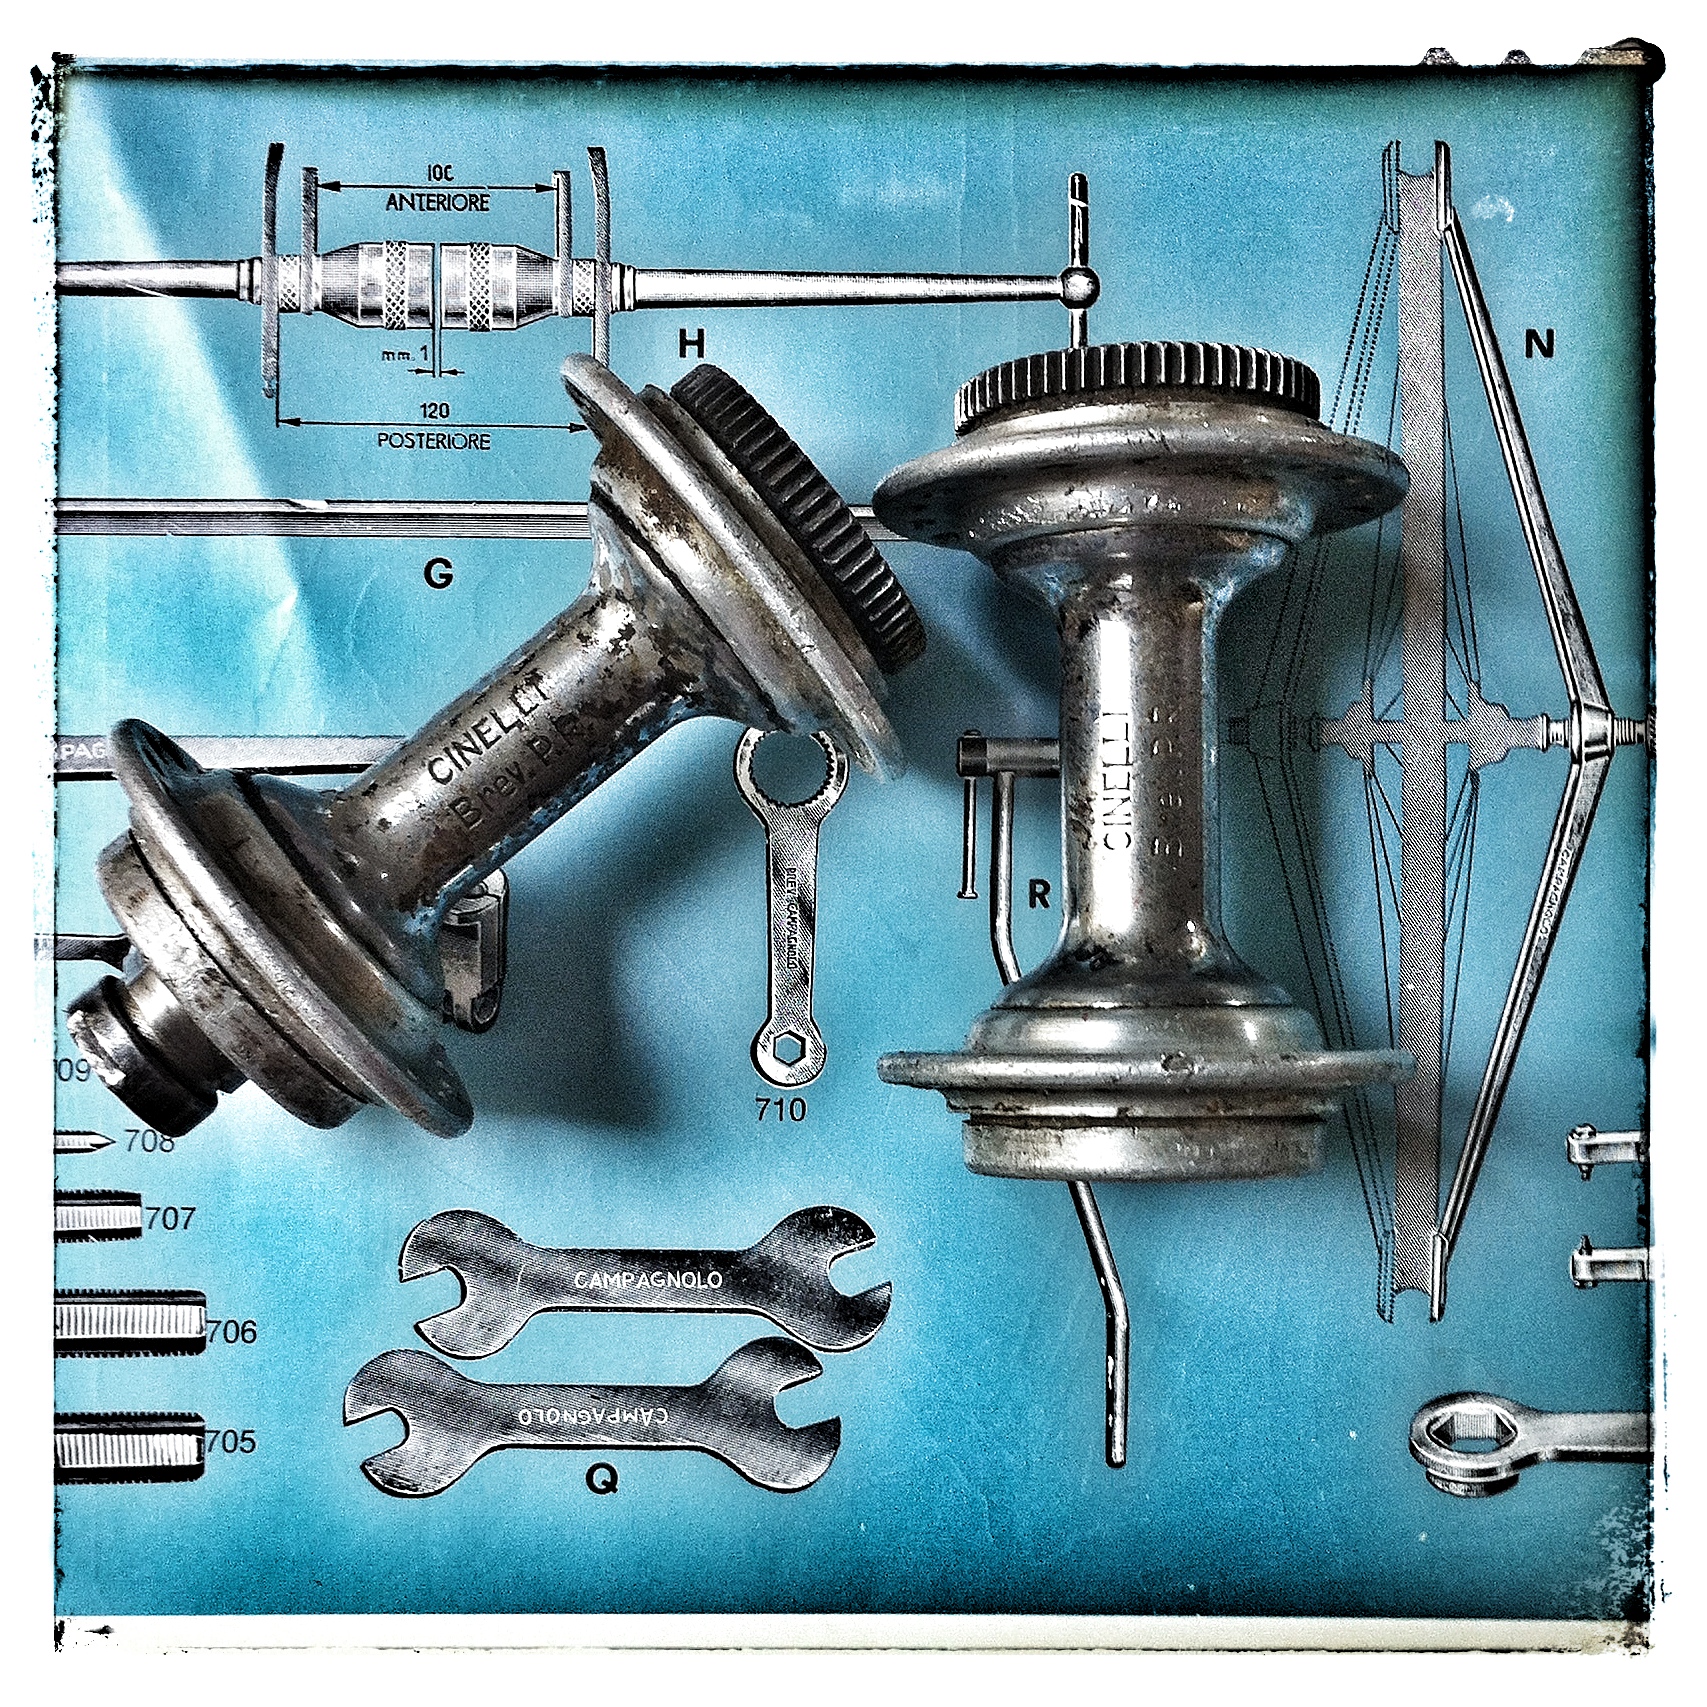
The Cinelli Bivalent hub which made its debut in 1962.

The Cinelli Bivalent hub which made its debut in 1962.

Collectors of vintage bikes and riders who are flocking to Eroica cycling events will find this of great interest. In the last few years there seems to be a renewed appreciation of the value and ride quality of vintage bicycles. People are investing in collectable bikes from the golden era of hand built machines. Names like Cinelli, Masi, Alex Singer, Rene Herse and a long list of others are becoming very hot items. These bikes are often 50 + years old and they deserve to be kept in excellent condition. Not everybody owns the necessary tools or has the mechanical know how to perform routine maintenance on these great old bikes. I would highly recommend that you allow that work to be done by a knowledgable professional mechanic who knows the ins and outs of these wonderful bikes. Over the years I have owned several amazing vintage machines. My favourite was a mint 1969 Cinelli Special Corsa in a lovely gold finish. It was a classic bike from one of the finest Italian builders of all time. I was also lucky enough to own a 1969 Alex Singer and I rode that for 25 years. Having worked at Bloor Cycle here in Toronto during the 1970’s I was exposed to some incredible examples of the best bikes made in the world and I became intimately acquainted with all the idiosyncrasies.

Being a wheel builder I took specific interest in the history of the various old hubs and rims that graced those bikes. I was a bit of a vintage nut so this was fascinating for me. Hubs made by Campagnolo, Airlite, Maxi Car, FB, Harden, Prior and Cinelli to name but a few. Rim companies like Nisi, Martano, Fiamme and Mavic.

The famed Italian lightweight racing rims from Fiamme.

The famed Italian lightweight racing rims from Fiamme.

If you have purchased an old collectable machine you’ll want to make sure that it’s all original and that its running as smoothly as possible. The wheels will periodically need some attention. Bearings will need to be lubricated or replaced on occasion and those rims may require truing now and then. Its a good idea to make sure that the wheels are at the optimum tension as well. If you need a new rim or vintage part I might be able to help you find them as they can be difficult to source. You can trust me to keep your collectable wheels in tip top shape. Contact me if you need some advice or help on maintaining your dream machine. You are in capable hands.

IMG_8828 3.jpg


Mountain bike wheels

Onyx Racing Products produce one of the finest MTB hubs in the world. It runs silently on a German made Sprag clutch that offers instant engagement. It also has German made hybrid ceramic bearings that couldn’t be smoother. Available in a plethora o…

Onyx Racing Products produce one of the finest MTB hubs in the world. It runs silently on a German made Sprag clutch that offers instant engagement. It also has German made hybrid ceramic bearings that couldn’t be smoother. Available in a plethora of colours and many spoke hole counts. Made in the USA and available through Cognoscenti Cycles.

MTB. An acronym that every off road rider in the world knows. Of course there was a time when few people dreamt of careening down a mountain on a bike, unless they were slightly mad. That all changed when some young upstarts in California started converting old Schwinns and other post war bikes that were popular with kids who once used them to deliver newspapers. These machines were the crucible that eventually became the MTB. Riders like Gary Fisher were at the forefront of this new cycling discipline. Could they have ever guessed that they had created a monster that would live on into the unforeseeable future and morph into several other things that no one had envisioned. Of course not.

But all new inventions take many twists and turns that only visionaries can see in their minds eye. Thank heavens these guys were crazy enough to reinvent the wheel shall we say.

Speaking of the wheel, i’d like to talk about that evolution a bit. Instead of recapping everything that has come before, i’d like to touch on where we are at now.

What we are seeing today is everything getting wider, and that means, rims, hubs, tires and axle spacing. In an attempt to make MTB wheels more robust hub designers have embraced the world of wide.

Boost hubs are 148mm, and this added width has helped strengthen the rear wheel with better spoke bracing angles and an improved equalization of tension between the drive side spokes and the non drive side spokes. Some hub makers offer even wider spacing for Fat Bike wheels and the like. Thru axles dominate for a solid engagement that’s completely reliable. Front wheels also come in a 110mm width and various axle diameters for added strength. Beefing up these wheels has been a very good idea, as some of them get subjected to serious punishment. So what companies make the best MTB hubs? Cognoscenti Cycles has partnered with over 25 different hub manufacturers and several of them make excellent MTB hubs. Some of my favourites are Onyx, Chris King, White Industries, Hope, Hadley, Phil Wood, Trailmech, Syntace, DT Swiss, Industry 9, Stealth, Project 321, Raceface and Tune among others. So there is an obvious bounty of choice here. Hubs to fit most every budget, colour, spoke count and technical needs.

Along with wider hub spacing has come wider tires. Almost every MTB rider these days is running a tubeless set up to take advantage of lower air pressure which improves handling and grip. Tire selection has steadily grown to include numerous tread options at various widths all suiting different terrain and conditions.

Carbon fibre now dominates much of the better quality rims, though alloy rims have not completely disappeared yet. Companies like Santa Cruz and We Are One Composites now offer life time guarantees for their carbon rims. That was unheard of just a few years ago. We have carefully scrutinised all the best companies for our carbon rim choices. Like our vast selection of hubs, we also cater to all budgets with carbon rim options. Names like Enve, Nox Composites, Boyd Cycling, HED, Pacenti, Astral Cycling, Atomik Carbon, We Are One Composites, MCFK and Kappius Components are the companies that we trust to deliver the goods.


Carbon is a special material because it has the potential to add some much needed compliance if the design is sound. It works well with tires running at lower pressures to absorb some of the shock that aggressive trails may dish out. The wheel build is quite critical here, especially the spoke count and the overall spoke tension. I pay particular attention to all the design attributes of a MTB wheel to assure that it’s providing the right ratio of strength and compliance. That helps a wheel to last considerably longer and yet be a comfortable ride as well.

I like to design a wheel set that suits the riders weight and style. I always make enquiries about those details as they will dictate choices like spoke gauge, spoke count, lacing pattern and rim weight. Each recipe will be different and suited to a particular rider. Believe me this makes a big difference!

If you are thinking of a wheel upgrade we can explore the many possibilities of hubs, rims and spokes. There has never been a greater selection of top quality options for all these components. If you are looking for a Toronto wheel builder Cognoscenti Cycles would love to build you a world class set of bombproof mountain bike wheels! Check out the brand new section on my website that showcases all the MTB hubs and rims that we carry, entitled “Off Road Wheels”.

Snapseed 3.jpg


Enve's new carbon fibre road hubs

Uber light with complete carbon hub bodies with molded spoke holes.

Uber light with complete carbon hub bodies with molded spoke holes.

I was eagerly awaiting the newest iteration of Enve’s carbon road hubs. In fact I was on the phone with the guys at Enve just prior to their public debut talking to them about this very subject. They even asked me what I thought they should include in the new hubs set. After a moments consideration I said they should at very least provide the option of a titanium freehub. Did that happen? Not this time.

So, whats actually new about their latest design? I’ll attempt to break down the many changes. The hub shell is 100% carbon and is made in the USA. The front hub is for a typical j-bend spoke and comes only on 20 holes for a radial lacing pattern. Its design is not really much different in those respects. It’s quite light at a mere 70 grams. The bearings are a high grade stainless version as well as stainless end caps. It’s quite petite with a 34.5 mm flange diameter. This small flange will introduce some more compliance in an other wise very stiff front radial wheel. A good call on Enve’s part.

The front hub is feather weight at a mere 70 grams!

The front hub is feather weight at a mere 70 grams!

Its the rear hub where we see some new designs. It weighs in at an incredible 185 grams for those of you who insist on uber light gear. It’s 24 holes and has departed from a standard equal distance spoke spacing on the flange. Instead it sports pairs of spokes. Enve chose to use a 55mm flange diameter, which I think is an excellent idea, especially for low spoke counts. It will improve lateral stiffness which is a good thing for a rear wheel with a typical 11 speed dish requirement. It appears that you have the option of two different lacing patterns. A 2 cross x 2 cross or a 2 cross drive side and a 1 cross non drive side. Personally I would be inclined to choose the double 2 cross option. Enve claims a 16% increase in lateral wheel stiffness from the previous generation of their carbon hubs. That’s significant. They have stated that there is no need for any pre-load adjustment on the bearings. Is that a bad thing? Not necessarily. In fact, several high end hub makers offer no pre-load adjustment on their hubs and this doesn’t seem to present any real problems. So, Enve has adopted this approach as well. I imagine it will be fine. At this time there is no offer for a ceramic bearing upgrade. Many hub manufacturers do offer ceramic bearings as an upgrade. Should this concern you? Probably not. If their stainless bearings are top notch, you’ll be rolling plenty fast.

Enve’s design incorporates paired spoke holes and slightly canted flanges.

Enve’s design incorporates paired spoke holes and slightly canted flanges.

Big changes with the freehub and drive system were implemented. Enve has decided upon a ratchet system with 40 teeth which is a significant change from the previous generations 18T version. No more pawls and increased engagement! Sounds like a win win situation to me!

Since their debut I have built two sets of wheels with these hubs. Both wheels were with Enve carbon road rims and Sapim CX Ray bladed spokes. I was able to build the rear wheel up to almost 120 kgf of spoke tension on the drive side with no issues. I had initially some reservations about the carbon fibre hub shells holding up under that much spoke pull but so far so good. Enve claims that the spoke holes are not drilled but rather molded. This is a big difference as molding does not disturb the fibres as much as drilling would, potentially compromising the integrity of the hub flanges. One rider in my cycling club rides one of these pairs of wheels and thus far they are holding up well.

So, will we see them ever in the pro peloton? Maybe, as only time will tell. For the time being I think they will have plenty of appeal to those who are searching for the lighest components available.


EPO Mondays

So the time has come for a Cognoscenti Cycles weekly ride to be born. It's now September and cyclocross is right around the corner, so I've organised an Urban CX ride for Monday evenings. Next week on September 10th a number of us will be meeting at Bob's coffee shop which is on the corner of Christie & Davenport. Our departure time will be 6:30pm sharp as there's lots of ground to cover before the sun dips into the horizon. This is an unsanctioned ride and therefore is not sponsored by any particular cycling club. It's a "ride at your own risk" night. We'll be riding through several parks and ravine systems to get you comfortable on uneven ground and some dirt. A cross bike or a gravel bike would be your best choice for the evening, though a road bike with 28mm tires could work in a pinch if your bike handling skills are honed. The pace will be quite civilised and the emphasis will be on navigating those paths and gravel sections with aplomb. Lights and helmets will be essential so charge those torches up to the max. We'll finish off the night in Forest Hill Village for ice cream at the Big Chill. I hope to see any and all who are up for a fantastic romp through some amazing ravines and parks. 


IMG_0449.jpg


Wheel Systems versus truly hand built wheels.

If you're in the market for a new set of wheels you may have heard a relatively new term bantered about. That term is "wheel systems". What on earth is a "wheel system" and why should you even care? If you are after an excellent set of wheels then read on. Wheel Systems is a phrase coined by the companies who invented this concept. You might see it in their literature or on the website of companies like Mavic, Campagnolo, DT Swiss and Shimano as they all have developed their own wheel systems. There are of course other companies with a similar approach.

The concept is essentially a simple one. The companies mentioned have decided it would be far more profitable to sell you a complete set of wheels than individual components that make up that wheel. For instance there was a time when the only wheel component that Campagnolo made were hubs. At that time Campagnolo was content with selling you their wonderful hubs and letting you choose rims and spokes from other different companies who specialised in making those items. During this era Mavic pretty much specialised in making only rims. This way of selling individual wheel components went on for many decades until someone thought it would be infinitely more profitable to sell you not only the hubs or rims but all the other items required for a complete wheel set. This was the birth of the "wheel system".  As their marketing departments went into overdrive new designs came out annually to help increase their market share. These new designs brought in extensive use of proprietary parts. This made it impossible for the consumer to use replacement parts from any other company except the one that designed and sold that particular model of wheel. So simply put, if you bought a Mavic wheel it was necessary that the replacement parts had to be supplied by Mavic as nothing else would fit properly. Now, this whole scenario might have been workable if one had ready access to the necessary replacement parts that every wheel eventually needs in it's lifetime. But often that is not the case. These companies seem to have little regard for making available their proprietary replacement parts to the buyer even as little as a season or two later. The end result is often the wheels are not repairable at all and they end up in landfill. Not what you'd expect after purchasing a pricey set of wheels from an internationally famous company. 

There is also one last fact that is often overlooked. That's the build quality that normally is associated with these wheel systems. Most of these large aforementioned companies have their own wheel factories where these wheels are built then boxed up and shipped out around the world. The typical "factory build" is rarely something to boast about. In fact, the amount of time that is taken to finish a wheel is astonishingly small! Some factories claim their wheel builders are turning out 6 wheels an hour. Now lets compare how much time I normally spend on a wheel. The average wheel that I build often takes over two hours. If you do the math this means on average I am spending 12 times as much time as a factory built wheel. They simply cannot be the same end product. By comparison a factory built wheel must cut so many corners to end up in a box in 12 minutes that it's not even funny! I think you get the picture.

So, is there an alternative to buying the hype and problems attached to all these new wheel systems from the big players. Thankfully there is! This is where your local custom wheel builder comes sharply into focus to save the day. Let me explain.

These days there are many small boutique companies making world class bicycle components. This is especially true in the world of wheels. Lots of fantastic hub & rim manufacturers turning out simply amazing quality stuff that anybody would be super stoked to ride. In fact, there has never been more choice than there is now. Names like Chris King, Onyx, White Industry, Project 321, Industry Nine, Phil Wood, Rohloff, Hadley, Extralite, Syntace, Hope, Royce, Gokiso, and those are just the hub companies! Tons of excellent rim options as well. There is absolutely no need to buy into this wheel system nonsense that completely lets you down when you happen to need a replacement rim or even something as simple as a few spokes and nipples to get you back on the road. The alternative is to avail yourself of the services of a custom wheel builder. He'll offer you far more real world options than any cookie cutter wheel system could hope to ever provide.  A professional wheel builder will design a set of wheels for you that will target your specific needs. Literally tailor made for your precise wants and desires. Choosing  the right hubs, from an array of lovely colours and the exact spoke count that matches your weight and cycling style. Choosing the rims that will make most sense for your needs as well as mating up perfectly with your favourite tire. Deciding on a spoke type and a lacing pattern that also will serve your specific cycling habits. You have absolutely none of these choices when buying a companies wheel system. None. Does that really make any sense? Of course not! With the help of an experienced wheel builder you'll be miles ahead with a custom designed set of wheels that accurately match your own actual real world needs. Also, those wheels have the potential to look quite striking in comparison to the run of the mill factory wheel set.

Cognoscenti Cycles uses absolutely no proprietary parts in any of our wheel designs. All our spokes and nipples are industry standard dimensions and won't disappear anytime soon, because they have been in common use for decades. We have partnered with the very best rim and hub manufacturers to provide a huge number of options, all that have readily available non proprietary parts. Exactly the way it should be. So, steer clear of all these wheel systems and save yourself some major disappointments when searching for something as simple as a replacement spoke that's no longer available that renders your wheel a useless paper weight. 

Enjoy the experience of putting together a killer custom wheel design that's all your own. It's the only way to fly. 

A unique and personal wheel set that is designed by a master wheel builder who's taking all your needs into careful consideration.

A unique and personal wheel set that is designed by a master wheel builder who's taking all your needs into careful consideration.

Signature Cognoscenti.png


My new gravel wheels

I recently bought a new titanium gravel bike. I must admit that I absolutely love it. I honestly had no idea whether or not I was going to fall for this new machine or not. The verdict is in and I couldn't really be much happier, with one exception, the wheels. This bike shipped with the new Ultegra R8000 group set which has been quite impressive, but it didn't ship with great wheels. So I sat down and designed what I think are the perfect gravel wheels. 

                                                  Aerospace grade 3.25 titanium double butted multi shaped tubes that absorb…

                                                  Aerospace grade 3.25 titanium double butted multi shaped tubes that absorb unwanted road shocks like nothing else. 


For some time I wanted to put my company name on an amazing set of hubs and I have found them. Onyx. You've seen me blog about them and I now own a pair to put thousands of miles on. Onyx did a fine job of laser etching Cognoscenti Cycles into the hub shells. A permanent record of my personal endorsement of these incredible USA made hubs. If you're familiar with these hubs you already know what makes them unique and special. A German made sprag clutch that offers instant engagement and runs silently. In my books silence is golden. They come stock with German made ceramic hybrid sealed bearings as well. A very nice touch! Onyx powder coated my hubs in a deep lustrous dark indigo colour. 

                                                                      &nbs…

                                                                              Indigo coloured Onyx hubs mated up to ceramic coated AForce AI 33's. Perfect!


The next aspect of this wheel design were the rims of course. What to use? There's a lot to choose from these days and I had to think about it. My recent interest in ceramic coated rims led me to my eventual choice. The AForce AI 33 ceramic. It's shot peened surface covered flawlessly in ceramic is beautiful. The jet black finish with laser etched logos. The tubeless friendly design with aerodynamics paramount in mind. In fact, in independent tests at the A2 Wind-tunnel in the USA, it scored the highest of any alloy rim and challenged many carbon rims known for their aerodynamic qualities. So it not only offers a very durable finish but it's fast as well. The rim profile is 32.5mm deep, 26.2mm wide with an internal width of 19.6mm. The published weight of approximately 485 grams its definitely not a heavy rim at all. Their use of the proprietary AF9X T6 alloy is unique. I would like to know more about the make up of that particular metal.  AForce offer rims with either internal or external spoke nipples. I opted for the external nipples which enable very quick and easy truing when necessary. 

aforce-al33-aero-alloy-road-bike-wheels-3-525x600.jpg
                                                                      &nbs…

                                                                              The AForce AI 33 Ceramic coated rim. Made from a proprietary AF9X T6 alloy. 

The next consideration was a lacing pattern and the choice of spokes. Since these are disc wheels that will get heavily used on old farm roads that can be at times a little gnarly.  I figured that a tried a true 3 cross pattern was in order. It's been around for forever and lets face it, it delivers! I decided upon Sapim Race spokes which will prove to be ideal for a 32 hole rear wheel and a 28 hole front. A spoke that has plenty of strength on tap, even if I decide to mount some panniers and head off for a cycle tour. My go to spoke nipple of choice has been for many years the Alpina ABS 5.5 mm HEX head brass nipple. No other nipple can compare to this one. I bring them in from Holland especially because I refuse to use any other brass nipple. It ticks all the boxes and then some. The ABS plug at the top stops the spokes from vibrating lose and strengthens the bond between spoke and nipple. I love the 5.5 mm HEX head for adding some additional strength to the nipple as well as enabling easy truing from behind the rim. Alpina has stated that they use absolutely no mercury in the production of their nipples which is great from an environmental standpoint. Kudos to them for figuring out how to eliminate that toxic metal from the manufacturing process. 

Alpina ABS-2 nipple.png


Lastly was the decision on what tires to use. The good thing is the fact that gravel riders are getting new tire options all the time as tire manufacturers are hip to just how popular gravel riding has become in the last few years. I thought I'd go with the Maxxis Refuse at 28 mm's wide. That's not a typical width for most gravel riders who often exploit much wider tires. I needed something that would work well for most hard pack roads in Ontario but could still be fast enough for a local club run on Toronto streets. So, the 28mm Refuse was the one. It's got a nice subtle diamond dimpled tread and the profile will work well with the AForce rim. I'll run them at about 100psi for club runs and less for farm roads. At a later date I'll probably start experimenting with some wider tires and maybe some more challenging roads along the way. 


Ceramic coated rims

Alloy rims with ceramic coatings are definitely more expensive, so why bother paying more for this exterior coating? Are they actually better than non coated rims? Valid questions when one considers that ceramic rims come at a premium price. They also require dedicated brake pads which is something else to think about when opting for a pair of wheels with this unique coating. 

The first ceramic coated rim that I got really excited about was the Boyd Altamont. On first examining it I was very impressed with how perfect the finish was. The brake track moved seamlessly into the rest of the rim. At a glance one might confuse it for a disc rim as the transition was flawless and almost invisible. The bead blasted surface was also executed perfectly. The finish is a very dark grey colour and it's definitely one of the nicest looking alloy rims on the market today. But looks aren't the whole story so I thought I would reserve judgment until I had built one up. The first pair went together beautifully. I was very impressed with the overall quality of the rim while under working tension. It offered the right amount of resistance to each additional volley of tension and when I was at full tension the rim exhibited no adverse reaction whatsoever.  This was a good sign of properly heat treated alloy. 

                               A custom set of gravel and cyclocross wheels that I built for a client. White Industry T11 road hubs with the Boyd Altamont ceramic rim.&n…

                               A custom set of gravel and cyclocross wheels that I built for a client. White Industry T11 road hubs with the Boyd Altamont ceramic rim. 


Boyd Cycling offers two versions of the Altamont. The regular at 495 grams and the "Lite" at 445 grams. Both rims were designed with a 25mm tire in mind, though it's certainly feasible to use tires from 23mm all the way up to cyclocross widths like 32mm. The internal width of the rim is 19.86mm. Both versions have welded rim joints which adds strength to the equation. 

1483470092263.jpeg


One of the advantages of a ceramic coating is improved wet weather braking. However, one must use the supplied SwissStop BXP brake pads to achieve that goal. 

SwissStop_WebSizes_HiColor_70x366.png
21696_1839980.jpg


Boyd claim that their ceramic coating will not wear off. They are on the second generation of this coating and the newest version is of course the best yet. I noticed that the ceramic coating added an extra degree of overall stiffness and strength but without being brittle which is paramount.

What about spoke hole options. The Altamont is available in 20, 24, 28 and 32 holes. Enough options to satisfy everybody from racers to cycle tourists. 

This rim was designed without metal eyelets so I would highly recommend that you have them built up with Sapim HM spoke nipple washers. This will prevent any future cracks near the spoke holes. 

A nice touch was the decision to use water transfer decals that are baked into the rim. No chance of them coming off prematurely. 

Lastly is the assurance of a tubeless compatible set up. Boyd has altered the internal dimension and made this rim completely tubeless friendly. The new bead locking shape ensures that the tire won't burp whether you are running higher road pressures or very low pressures used by cyclocross riders. 

So if you're thinking of having a set of alloy wheels built up you should seriously consider the Altamonts. Though a bit more expensive, their level of quality and performance won't be easily matched with less expensive non coated alloy rims. 

th.jpeg


Sapim spokes

Sapim hails from Belgium. A spoke manufacturer founded by Herman Schoonhoven at the end of WW1 in 1918. 2018 marks a century of innovative production, and I am sure a lot of unique expertise has been gained over those many decades. So what is it that separates Sapim from it's competition. 

As an ISO 9001 certified company Sapim takes quality control very seriously. Its SCFT system (Sapim Advanced Cold Forging) produces spokes with a proprietary manufacturing process that enables  them to stand apart from the competition. It's no wonder that world champions and olympic athletes have stood on the podium thankful that they put their trust in Sapim's products. 

Their are a few spoke models that are perennial favourites with many wheel builders including myself. The most famous spoke would undoubtedly be the CX Ray. A bladed "aero" spoke that boasts a super light weight as well as being the strongest spoke that Sapim makes. This model is fairly ubiquitous in the pro peloton as the default ultimate racing spoke. The middle section of this spoke has a strength of 1600 N/mm2 which may not mean a lot to the uninitiated but believe me that's impressive! It's dimensions are 2.0 x 0.9 x 2.2mm.  It's weight is close to that of a titanium spoke which is also a notable achievement. Available in both a standard J bend and a straight pull version. Each Sapim spoke is stamped with the companies name, proudly displaying who made it.

SAPIM-CX-Ray-Race-Spokes-with-SILS-Alloy-Nipples-for-Bike-Wheels-Mix-Length-Customized.jpeg


The Sapim Race is their meat and potatoes double butted spoke. I really like this particular spoke as it suits the needs of probably the most cyclists buying hand built wheels. It has excellent strength characteristics and is an ideal weight for most riders. A 14 gauge spoke with a 2.0 x 1.8 x 2.0mm dimension. A very respectable middle section strength of 1300 N/mm2. Available in both black or a silver finish in either straight pull or J bend. Perfect for a set of racing or training wheels. MTB riders could choose between these and CX Rays. 

Sapim uses the best quality steel wire to ensure the greatest tensile strength.

Sapim uses the best quality steel wire to ensure the greatest tensile strength.


The Sapim Force flies a little under the radar but it really shouldn't. It's actually a fave spoke of mine. It's very close to the dimensions of the Race model but has a slightly thicker section closest to the hub flange. This slight increase in size has a noticeable increase in overall strength. Perfect for slightly heavier riders or those who aren't exactly careful with their wheels. I use them to help beef up MTB or gravel wheels or even for light touring wheels. A great solution when just a little extra strength is desired, with next to no weight penalty. It has a dimension of 2.18 x 1.8 x 2.0mm. The centre section boasts 1400 N/mm2 in tensile strength. 

Sapim also manufacturers their own spoke nipples. I was happy to see them finally add a hexagonal nipple to the selection. I have used 5.5 mm hex head nipples almost exclusively for the last 5 years and therefore most of the old school slot head nipples hold no interest for me. The advantage of hex head nipples are twofold. The ability to work from behind the nipple affords the use of different kinds of tools to turn nipples, yet it still has the conventional 3.2mm square interface for normal spoke keys on the other side of the rim. It also has a taller head which means more of the threaded end of the spoke is held by the nipple. This strengthens this junction and gives the wheel builder a little bit of grace for the spoke length. If a spoke is a half millimetre too short it's no big deal.  

hexagonal.jpg

The humble Sapim HM washer should not be forgotten. This little round washer cups most spoke nipples perfectly providing just the right amount of support for rims that have no eyelets. I have been using it for years now and i appreciate the protection it offers to alloy rims without eyelets. This helps to prevent rims from cracking, which is not uncommon for many modern alloy rims that have forgone the use of stainless steel eyelets. 

The Sapim HM washer is the perfect solution for building with alloy rims that don't have eyelets.

The Sapim HM washer is the perfect solution for building with alloy rims that don't have eyelets.

Recently Sapim enlisted the help of the folks at P&K Lie, makers of the most desirable wheel truing stand in existence to design them a suitable spoke tension meter. This German company came up with a plier style design not that dissimilar from the well known DT Swiss Tensio 2. It's a good quality meter that comes with all the necessary paperwork to correlate actual spoke tension with the various Sapim spoke models. 

P&K Lie's spoke tension meter.

P&K Lie's spoke tension meter.

These days I am predominantly using Sapim spokes for most of my custom wheel builds. I have found the quality control to be quite excellent, which is essential for high end wheels. 

I certainly haven't discussed every single product that Sapim makes, so a trip to their website wouldn't be a bad idea if your curious about what else they make. 

sapim-logo.png


Enve SES AR Disc carbon rims

In the world of American hand made carbon rims Enve stands out as both a leader and innovator. Commanding top dollar for their rims means that not everybody will be riding a set. Having just built a pair of the Enve AR Disc rims I am reminded why people will seek out this company for their custom wheels. The set that I just built up were of exceptional quality, which you would certainly expect at this price point. There are features common to Enve that really help in arriving at a world class wheel. One would be the spoke holes which are not drilled as an after thought but are actually part of the molded design. This ensures that their placement is uniform through out the rim which helps to facilitate very even tension in the initial stages of the build. Details like this would only be recognised by a wheel builder, but are evidence that Enve understands the process intimately. The next thing that any wheel builder would immediately notice is how round and true the rim is when beginning the build at low tension. Both rims I recently built were quite round and flat which goes a long way in attaining a uniform finished tension. Once again, this is something that a buyer may not be aware of when just looking at a pair of completed wheels. The exterior finish of those AR Disc rims were impeccable. Again, something that would be demanded for sure at this level. Another design consideration is the depth of the front rim verses that of the rear one. Enve has decided upon a slightly deeper rear wheel which means the rim has a depth of 55mm while the front rim is 49mm deep. This will provide some additional stiffness in the rear wheel as well as certain aero benefits. 

spec-profile-45ar-clincher-300x0-c-default.png

What about weight? The AR Disc has an ideal weight for it's intended use. These rims are for both road and gravel terrain which means they might be subjected to a bit of a beating now and again. The rear is 450 grams and the front is about 440 grams. This will build up a very light weight set of wheels, but not too light which might be of concern for some gravel riders. 

Enve has certainly participated in the trend toward wider rims and these were designed to exploit widths of 28 to 30mm tires. Perfect for light gravel excursions or a plush ride on the pavement. Both rims have an internal width of 25mm which will create a nice tire profile if your riding 28's or slightly wider tires. These rims are of course tubeless ready for those who wish to jettison themselves from tubes. 

                                                                      &nbs…

                                                                                                                     The Enve SES AR Disc carbon rim. 


Enve describes this rim as "conceptualised for the cobbles of Paris-Roubaix through their partnership with Team Dimension Data".  I am certain that the rims that were tested for that particular event were with tubular tires, yet I am convinced that all of those positive design attributes will also be realised on the very similar clincher version. 

These rims appeared to exhibit a great degree of intrinsic strength, as after I stress relieved them toward the end of the build, they barely went of of true at all. That's a really good sign!

So, if you are thinking of investing in some really nice carbon rims for your gravel machine these might be the answer. Light, strong, aero, and plenty of bragging rights in the peloton!

ENVE_Logo-02.jpg


Cognoscenti Cycles new spoke tension meter

It's been in development for some time, but I can now happily say that Cognoscenti Cycles has a brand new spoke tension meter that we are excited to be bringing to market. This effort was brought to life in collaboration with Filip Kralyevski who has been gaining a reputation over the last couple of years for producing high quality spoke tension meters with important unique innovations. I first acquired one of Filip's meters while I was living in Paris. I stumbled across his amazing work while sifting through a blog that had mentioned him. I was immediately interested to find someone who wanted to push the envelope in both overall quality and some innovative ideas. After an extensive dialogue with Filip and over a year of testing his meter I knew that he was the guy to collaborate with on a special meter for Cognoscenti Cycles. 

            The first prototype of the Cognoscenti Cycles spoke tension meter. This model has a delicately bevelled edge showing off some premium CNC workmanship. 

            The first prototype of the Cognoscenti Cycles spoke tension meter. This model has a delicately bevelled edge showing off some premium CNC workmanship. 


So, what is it that makes this new spoke tension meter unique? It's really the sum of it's very high quality parts. No expense was spared in the manufacturing of this tool. Filip is an expert in CNC machining and that is immediately evident when you examine the work on the 6082 alloy body. It is weight relieved with several carefully placed large cut outs that both give it a beautiful look and keep the weight down to a minimum without sacrificing any strength. It's anodised in a purple finish that shows off the fine detail wonderfully. The body corresponds perfectly to the shape of the Swiss made Atorn dial indicator. 

In an effort to reduce any friction when a reading is taken, Filip decided to incorporate a THK linear roller bearing. This linear bearing is an ultra precise piece comprised of over 50 distinct internal parts, and this is what separates our meter from any other meter in existence.  It not only alleviates unwanted friction but helps to enhance the accuracy of the dial indicator. 

Underneath that 6082 alloy enclosure is the THK linear bearing. It incorporates 50 precision pieces to enable an almost completely friction free action. No other spoke tension meter made today utilises this unique design feature. 

Underneath that 6082 alloy enclosure is the THK linear bearing. It incorporates 50 precision pieces to enable an almost completely friction free action. No other spoke tension meter made today utilises this unique design feature. 


One other important addition was that of sealed bearings in the spoke path. I feel this feature helps in quickly placing the meter on a spoke and also works when zeroing out the meter when you are ready to take a measurement. The meter glides along the spoke effortlessly. To my knowledge, there are only a few other spoke tension meters that have incorporated this idea. 

After testing a few different springs Filip decided that a local custom spring maker could provide us with the exact spring we needed which is made from carbon steel. All the small details like this add up to a superior functioning meter. 

The 6082 anodised alloy body achieves an ideal weight for this tool. 696 ZZ bearings facilitate easy movement in the spoke path, and the Atorn dial indicator provides perfect accuracy with each tension measurement. The ultimate spoke tension meter f…

The 6082 anodised alloy body achieves an ideal weight for this tool. 696 ZZ bearings facilitate easy movement in the spoke path, and the Atorn dial indicator provides perfect accuracy with each tension measurement. The ultimate spoke tension meter for those who insist upon the best. 


Our meters design owes a debt to Jobst Brandt, author of "The Bicycle Wheel", who originally produced a spoke tension meter with this triangular shape. Several other companies have also exploited this design. It sits very nicely in your hand and is quite light weight which is especially important for any tool that might be used by a wheel builder for a better part of the day. 

I would be remiss if I didn't remark on the ultra high quality dial indicator that we have chosen. It could have been tempting to opt for a cheaper dial indicator, but our goals were centered around producing the finest meter possible so naturally we decided upon using an ultra high quality dial indicator. A single reading is all that is necessary to know that you have arrived at an accurate tension evaluation. With each meter we will include a small handy chart that provides the tension values for various spoke dimensions. Those numbers will give you corresponding information about the actual KGF (kilograms of force) of spoke tension. If one prefers to work in Newton Meters, simple online conversion tables will make that calculation for you. 

Our meter is put together with fine quality stainless steel screws and even our plunger handle is hand made. In the end we feel quite confident that we have not overlooked any detail in building the finest spoke tension meter available today. Not only does it hold its own against the competition, we feel that it stands alone as the first choice for those who insist on the highest quality tool available. If you are a serious wheel builder who thinks this should be part of your work flow, then please contact me for any additional information. Our meters are hand made one at a time for each individual customer. 

                                     All current Cognoscenti Cycles spoke tension meters will proudly bare the name of our company with an engraved brass …

                                     All current Cognoscenti Cycles spoke tension meters will proudly bare the name of our company with an engraved brass plaque. 


Santa Cruz Reserve

Santa Cruz has brought to market a new carbon rim that's making even the most jaded bike junkie sit up and take notice. Have they done the impossible? I'll let you decide. The "Reserve" is the name of this nearly indestructable carbon fibre rim. I first took notice of it after seeing a video of Danny MacAskill attempting to literally destroy this rim by riding up and down cement stairs at speed and eventually doing it with no tire on. It took quite an effort to finally kill that rim! 

reserve_wheels_grey_rollup.jpg

Santa Cruz is so confident in the hardiness of this rim that they are offering a lifetime warranty. When was the last time that you heard of a lifetime warranty on a carbon rim? So, what makes this rim so unique and so difficult to kill? Lets take a look at some of the design details that make this rim special. 

First off is the asymmetric spoke bed. A 3 to 5mm offset, depending on the rim model, helps to equalise spoke tension on both rear wheels as well as front disc wheels. This is a great idea that I wish was utilised by more rim designers. 

Santa-Cruz-Reserve-Assym-Spoke-Bracing-Angles.jpg

The next noteworthy design consideration is the actual spoke nipple seat. This area has been beefed up considerably. This likely will guarantee that nipples will rarely ever pull through even under very high tension. 

                                                                      &nbs…

                                                                                       The Reserve is available in only a 28 hole spoke count through all models. 

Santa Cruz has entrusted the manufacturing of these rims to an Asian company that has not been disclosed. The fact that this rim is not made in the USA doesn't surprise me, as several Asian rim makers have extensive experience and have solid quality control. 

reserve_cutaway_crosscut.jpg

Here's a cutaway photo of a Reserve rim and as you can see it has no bubbles or any other type of voids that are sometimes found inside carbon rims. All in all, very clean work. 

reserve_valve_cu-900x599.jpg

So what different models are on offer. The Reserve is available in both 27.5 and 29er's in a few different widths. 

Reserve29-1024x770.jpg
Reserve27.5-1024x769.jpg

Obviously these rims will be the domain of the MTB world but I certainly could see the Reserve 25 getting used by the gravel grinders out there. In fact it might be a really ideal carbon rim  at 390 grams for those looking for a compliant ride and near indestructibility. 

This brings me to my one beef about these incredible rims. At the moment I don't believe they are available to custom wheel builders like myself. Hopefully Santa Cruz will soften on this position and decide that only good can come by making them available to all those talented wheel builders out there who will pair them up with interesting hub choices. I would love to build up a set and thrash them on some of my fave gravel roads. 

s1600_Santa_Cruz_Reserve_Carbon_Wheels.jpg
scb_logo.png

Bitex hubs

image001.jpg

Bitex is a Taiwanese company that manufacturers a wide selection of hubs that suit a number of cycling disciplines. They also have a few notable innovations that are patented, like their 'Anti-Bite' freehub. This uses 3 small stainless steel splines to stop the cogs from digging into the 7075 alloy and prematurely wearing this part. A great solution to an old problem!

20170317-home-FB.png

This gives you the best of both worlds, enabling the use of a light alloy freehub that shares some of the wear characteristics of a heavier steel freehub. For those who insist on the best material, Bitex also offers a complete titanium freehub as an upgrade. Personally I am a huge fan of titanium freehubs so I think this is a fantastic option!

                   A six pawl titanium freehub upgrade at a mere 107 grams! 

                   A six pawl titanium freehub upgrade at a mere 107 grams! 

So lets take a look at one of their popular road hubs, the RAR9. This hub comes stock with their Anti-Bite 7075 alloy 6 pawl freehub and is designed for standard J bend spokes. Shimano 10/11 speed, Campy and SRAM compatible. Two different lower spoke hole combinations are available,  24, 20, and their 7/14 and 8/16 combinations. This is a standard quick release hub in either 130 or 135mm axle lengths. 

                  The RAR9 road hub. Tipping the scales at 192 grams. 

                  The RAR9 road hub. Tipping the scales at 192 grams. 

                                            The devil is in the details. Here's the specs. 

                                            The devil is in the details. Here's the specs. 

So what do they have in the world of disc brake hubs? The BX106R comes immediately to mind. This hub offers a centerlock interface for the rotor and is a very respectable 230 grams. Axle lengths of 135/12, 142/12 and 135 QR are available. Spoke hole counts of 24, 28, and 32 should answer most needs. 

The BX106R centerlock hub, comes stock with their 7075 alloy Anti-Bite freehub. 

The BX106R centerlock hub, comes stock with their 7075 alloy Anti-Bite freehub. 

Next up is a very cool looking straight pull hub, the BX311R. This hub is designed for a specific lacing pattern that uses 14 spokes on the drive side and 7 on the non drive side. There's also an option of 12/24. Weighing in at 217 grams. 

    The BX311R rear straight pull hub, with the 7/14 or 12/24 lacing pattern. 

    The BX311R rear straight pull hub, with the 7/14 or 12/24 lacing pattern. 

                The BX311F matching front straight pull hub at 86 grams. 

                The BX311F matching front straight pull hub at 86 grams. 

Bitex has hardly forgotten the MTB crowd. Lots of different models are on offer. A trip to their website is a must do to see all that you have to choose from. You'll be pleasantly surprised!

Here's the BX210R for the boost hub riders. Comes with a 6 bolt disc interface and is available in both 28 and 32 spoke hole counts. A 148/12 mm axle configuration with their patented Anti-Bite 7075 alloy freehub. 

                     The Bitex BX210R MTB boost rear hub. 335 grams. 

                     The Bitex BX210R MTB boost rear hub. 335 grams. 

Cognoscenti Cycles is happy to add Bitex to our diverse selection of hub offerings. If you are in love with the colour black, and who isn't, then here's the chance to get some premo hubs for a very attractive price! 

Titanium

Appearing on the periodic table of elements at number 22 is the metal titanium. Discovered in 1791 by the Reverend Walter Gregor, it's name came from Martin Heinrich Klaproth who chose it from the Titan's of Greek mythology. Titanium is truly an amazing metal that is used in airplanes , aerospace & military technology, bodily implants as well as special medical tools and of course the bicycle world. 

s13.JPG

My first introduction to titanium in the realm of bicycles goes back to the early 70's. In 1973 two companies almost simultaneously came out with frames made of titanium. One from the USA, the Teledyne Titan and one from the UK,  the Speedwell Titalite, from the Speedwell Gear Case Company in Birmingham. At the time I happened to be working at a bike shop who had hired a fellow from England who did the initial testing on the Speedwell titanium frames. That season Luis Ocana rode several stages of the Tour de France on a Speedwell titanium frame. This was the very beginning of titanium in the pro peloton. A number of years passed before other frame builders began to exploit the amazing properties of titanium in racing frames. Today we see many titanium frame makers. The hottest new bike is definitely the "all road" or gravel bike and many of the best ones are made from titanium, exploiting the magic carpet ride that only Ti can provide. 

1.jpg
cover_1973_TdF_sanders.jpg

Luis Ocana with his Speedwell titanium machine.


Frames are not the only place where titanium shows up. Numerous components are made from this metal. I'd like to highlight the area's where titanium crops up in the world of wheels. 

Hub makers have for some time used titanium successfully in several areas. Titanium axles have been used by Shimano in some of their Dura Ace hubs. They are lighter than steel yet super strong. Shimano has also used titanium for their Dura Ace freehubs. In my opinion there is no better material for a freehub. Hadley hubs from California offers a Ti freehub. Titanium has an ideal strength to weight ratio and will not rust or corrode and therefore surpasses in this area. 

41pZXLeQdRL._SL500_.jpg

A Shimano Dura Ace titanium freehub. 

ZH726404-D-4-24.jpg

Lightweight titanium quick release skewers.

Some of my favourite hub manufacturers have chosen titanium as their material of choice for not only for their freehubs, but several other parts as well. Titanium 6AI-4V quick release skewers are very popular and are both extremely strong and reliable. Companies like Royce in the UK and Gokiso in Japan have made hub models from solid titanium billets. These hubs are quite expensive but they are incredible and unique. 

gokiso_introduction_topimage4-1.jpg

Gokiso titanium hubs from Japan. Made from solid billets of aero space grade Ti.  Undoubtedly the most expensive hubs on the planet. 

550.jpg

Royce titanium hubs with a carbon fibre centre. 

Spoke manufacturers have not ignored titanium but their success's have remained somewhat elusive. DT Swiss once made a titanium spoke which is now discontinued. Today companies like Pillar of Taiwan are producing 3 titanium models at very light weights. These spokes are best left to very light riders who are looking to keep their wheel weights at an absolute minimum. 

P24-Ti X-TRA-Lite2.jpg

Pillar's X-TRA Lite Ti bladed spoke.  A 260mm spoke weighs an incredible 2.6 gr grams!


Spoke calculators

The correct spoke length is absolutely essential for a properly built set of wheels. You would think this would go without saying, but I am never really surprised when I see expensive factory built wheels that don't have the correct spoke length. Either too short or too long, they are missing the mark of high quality workmanship. You would think that a factory which may be building thousands of the same model would get that right, but not always. This failure can lead to premature spoke breakage. 

                                                        A good quality stainless steel spoke ruler will enabl…

                                                        A good quality stainless steel spoke ruler will enable you to measure to within a half millimetre. 

So, how does a wheel builder arrive at the most ideal spoke length? Years ago before the era of handy online spoke calculators it was a much more challenging job. I used to have a little black book that recorded every wheel that I built with the hub model, rim model, lacing pattern and what the corresponding best spoke length for those parts was. We also had at our disposal the Sutherland Handbook for mechanics which had suggested spoke lengths. It generally was quite helpful but it didn't have every answer among its pages. 

Fast forward a few decades and companies like DT Swiss started to develop their own online spoke calculators. In many ways these were a God send for mechanics and wheel builders everywhere. Today there are several reliable online spoke calculators. 

How do they work? Initially someone had to develop some pretty sophisticated software to number crunch an infinite array of measurements to bring these to life.  For those actually using them, it's really just a matter of plugging in the correct numbers on hub dimensions and rim ERD and the program does all the hard math for you and spits out it's suggested spoke lengths. 

Are those suggested spoke lengths absolutely reliable? In most cases they are, but now and again I get a suggested length that isn't exactly ideal. Not a world away but a slightly different  length would have been better. I always keep my print outs and make notes for future builds. 

To ensure predictable accuracy its wise to take your own ERD measurements before beginning.  By the way, ERD stands for the "effective rim diameter" . These numbers are often supplied by rim manufactures but they are sometimes not accurate. This mistake can lead to the wrong spoke length being recommended. An investment in a pair of WheelSmith rim rods will give you a proper ERD measurement. 

A word or two on taking the hub measurements. Invest in a decent quality digital vernier calliper. It will pay for itself eventually. Hub measurements are often supplied by the manufacturer but double check that they haven't made an error in what they have published. It might save you having to get new spokes cut.

There are a number of online spoke calculators I'd like to mention. I have had reliable results from DT Swiss, prowheelbuilder.com and wheelpro.co.uk . 

                                          DT Swiss is a great online calculator, especially if you are building with their products. 

                                          DT Swiss is a great online calculator, especially if you are building with their products. 


I often will use more than one online calculator to check to see how close a recommendation they make. Sometimes they are almost identical and other times there may be a difference of a half millimetre or so. If there is a notable difference in recommendations I'll invoke the opinion of a third calculator. As you investigate various online calculators you'll become familiar with their strengths, weaknesses and idiosyncrasies.

My new favourite calculator is an app that's on my Iphone. It was developed by Douglas Pepelko and it can be procured through the Itunes App store. It's called Quick Spoke and it's simply amazing! I would highly recommend this very handy spoke calculating app. It has a long list of hubs with all the measurements already there for you. It also has a comprehensive list of rims with their ERD's. There are also other features like the information relating to bracing angle of the spokes as well as the percentage of tension on each side of the wheel. It also enables you to save your calculations for future reference. For the wheel builder on the go, this is the best app out there. At $1.99 you can hardly go wrong. 

       Quick Spoke already supplies you with all your hub measurements. Handy!  

       Quick Spoke already supplies you with all your hub measurements. Handy!  

Quick Spoke is very straight forward, and even a newbie will be comfortable with it. 

Quick Spoke is very straight forward, and even a newbie will be comfortable with it. 

There are several other online spoke calculating websites that are out there. I have had the best results with the ones I have mentioned. That's not to say you won't find a different one that's ideal for you. Whichever one you decide upon keep in mind that you are a thousand miles ahead of the days when nothing like this even existed. Keep a record of your various wheel builds so that you can reference them one day in the future. Most important, try to have some fun building those wheels!